Andrew Whipple
The most sensational, inspirational, celebrational, muppetational
Woodworking
Over the last 4 or so years I've gotten into doing some amateur woodworking! Mostly I like building furniture (exclusively for my own use so far) and because I'm an amateur with a basement "shop" it's mostly plywood-based and relatively simply designs.
Projects
Here's the various projects I've done to date! All are personal (so far)
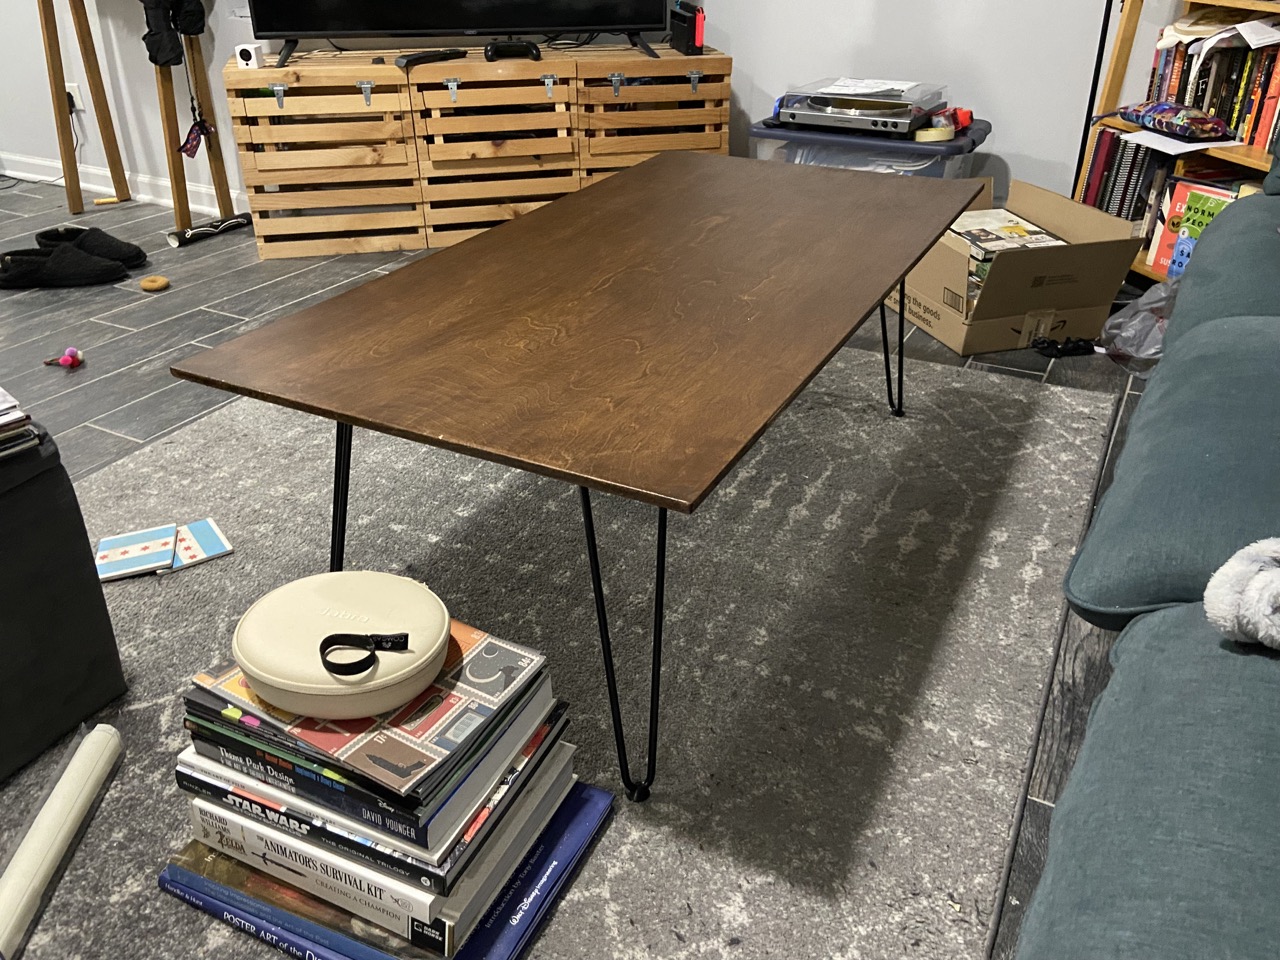
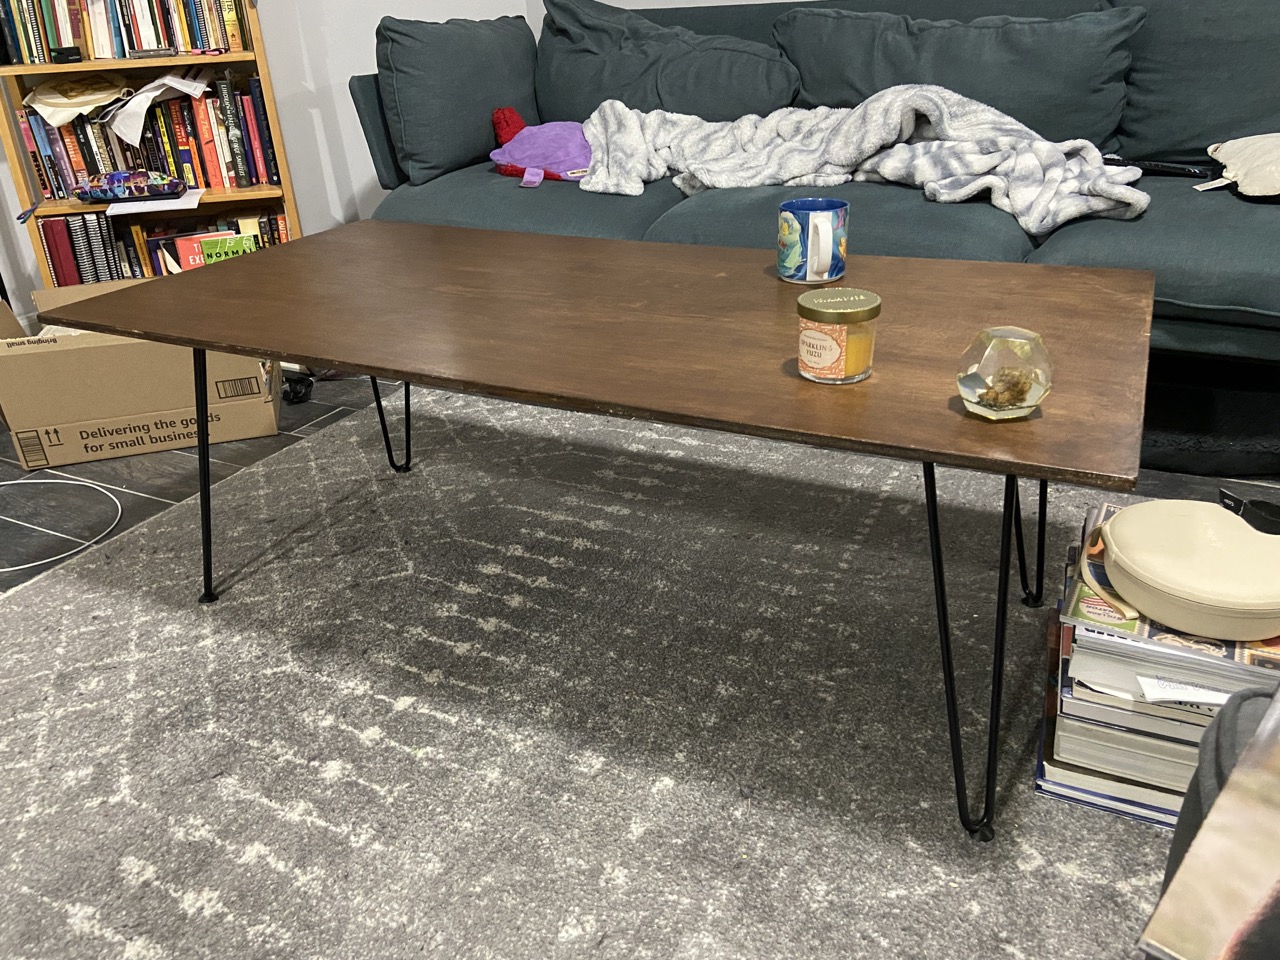
Coffee Table (~2019)
The first and the simplest! Or rather, simplest in theory if I'd learned anything before trying to make it. It's a 2'x4' 1/2" plywood project panel, with a little brace of sorts made out of 1x3 pine, stained in dark walnut, finished with water-based polyurethane, and using some hairpin legs from Amazon.
Many things to learn from this! Such as:
- screws and glue being better than nails (which I started using, horrifically enough started by trying to nail the brace from the top which left an ungainly finish nail head forever)
- staining raw plywood edges looks bad, or can if not done carefully and intentionally
- hairpin legs actually work out really well, especially for the price
- 3/4" plywood should be a good baseline for anything that needs stability
- sand more carefully (or, spoiler alert, use a random orbit sander) or you'll get visible marks that never go away, especially after staining
- How to stain and finish
- Finish-wise, I like water-based polyurethane
I kept this until I scrapped it prior to moving in 2022.
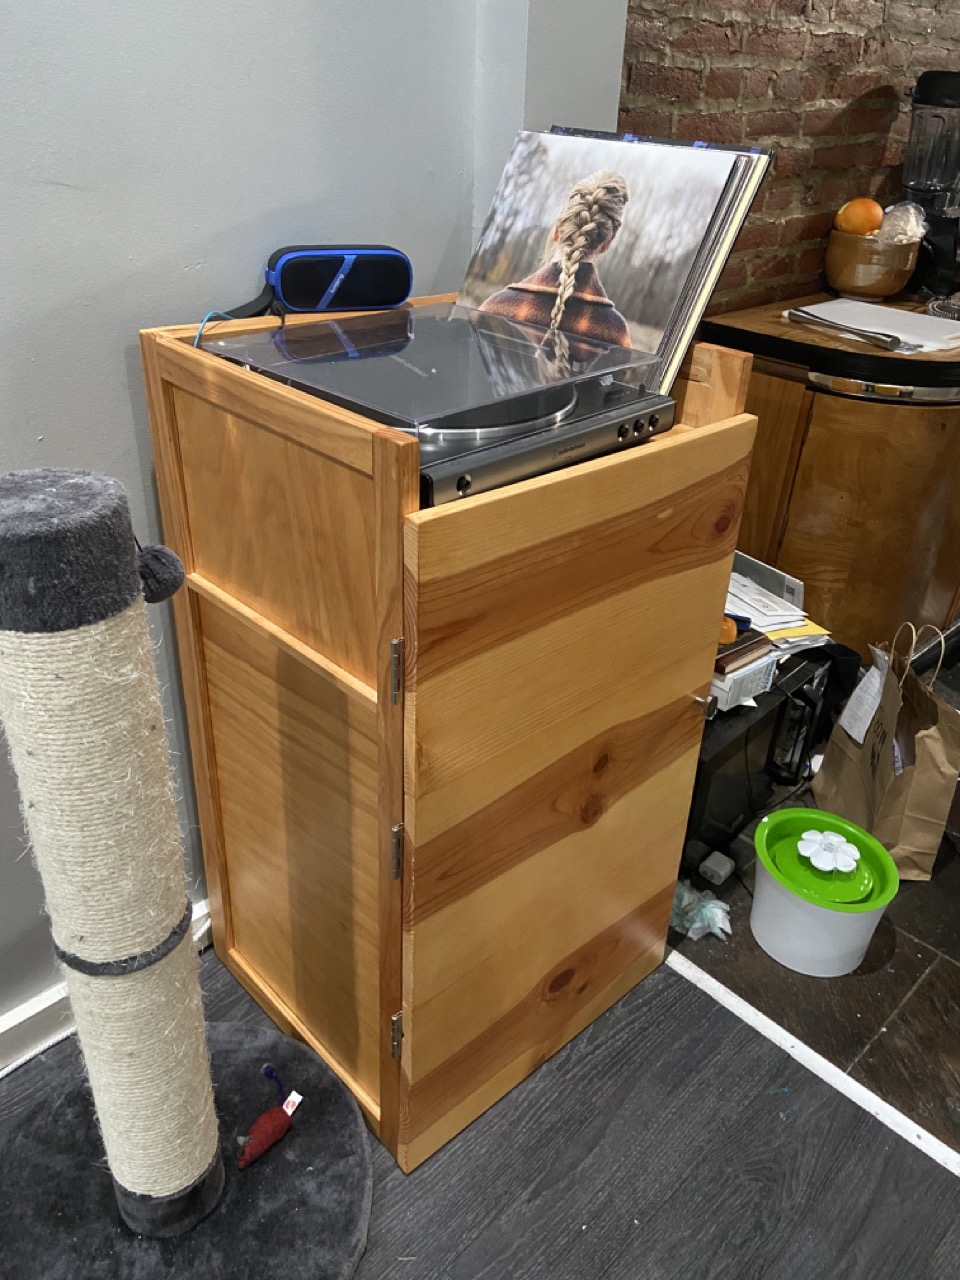
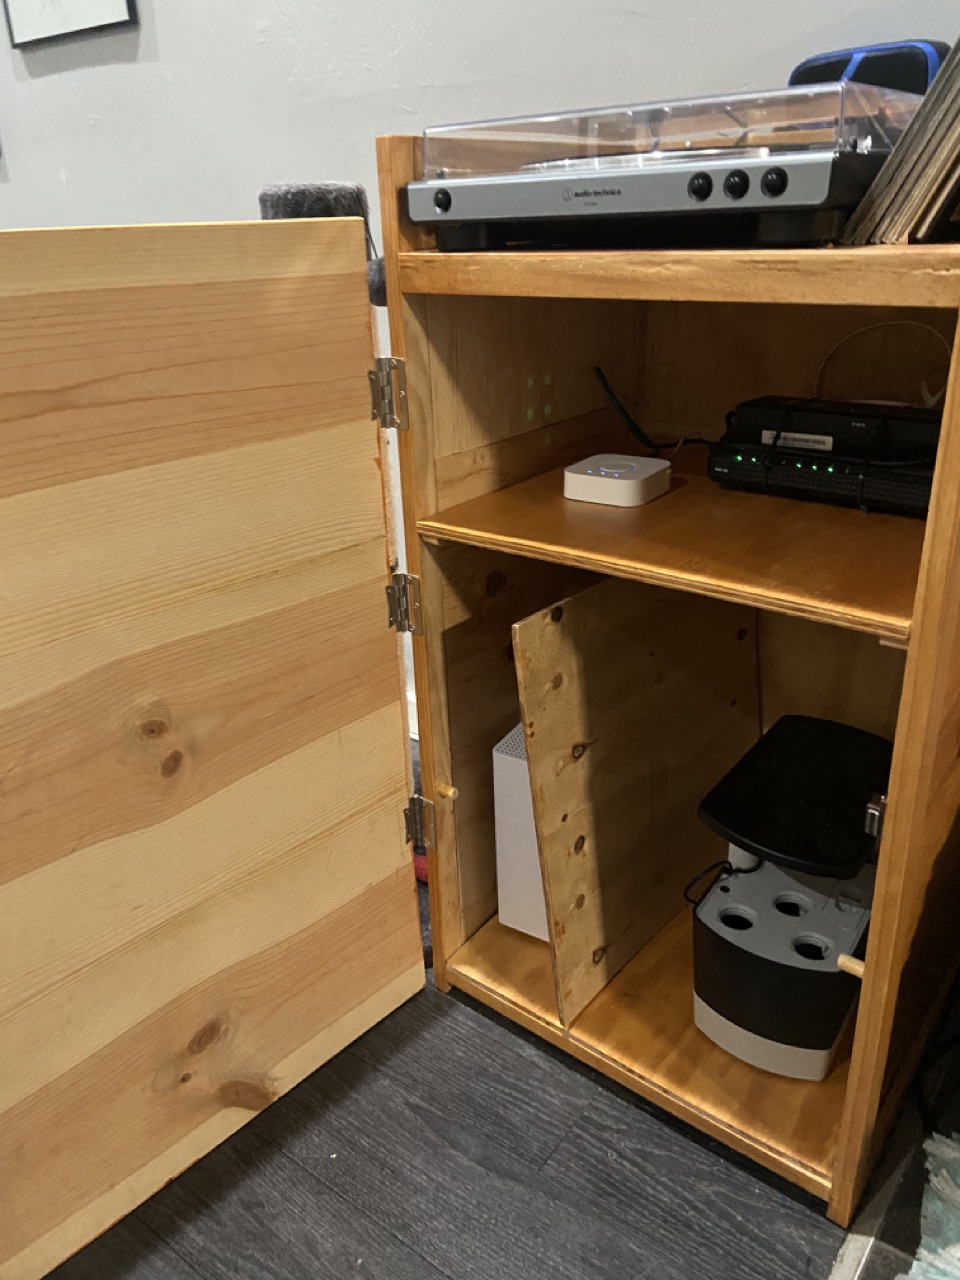
Modem/Router/Printer Cabinet (~2019)
More pine and plywood furniture, in this case because I needed something to put my router and modem and printer into and wanted a place to store my ungainly powerstrip where my cat wouldn't mess with it.
Learnings!
- How to use pocket holes, and that they need to go into the bulk of the wood even if that's less aesthetically pleasing
- Chiseling rabbets
- Plywood has a rough side and a finish side, and the finish side should go out
- That I don't love combination stain + poly, and prefer doing them as separate steps
- How to make panel joints
- How to hand-plane
- How to (poorly) hand-saw plywood and hardwood
- How to use a flush-trim hand saw
- How to use a random orbit sander
- How to use flush-mount hinges
- Doors to cabinets should not be flush with the floor, so they don't scratch against an uneven floor as you open and close them
This is still in use as of writing.
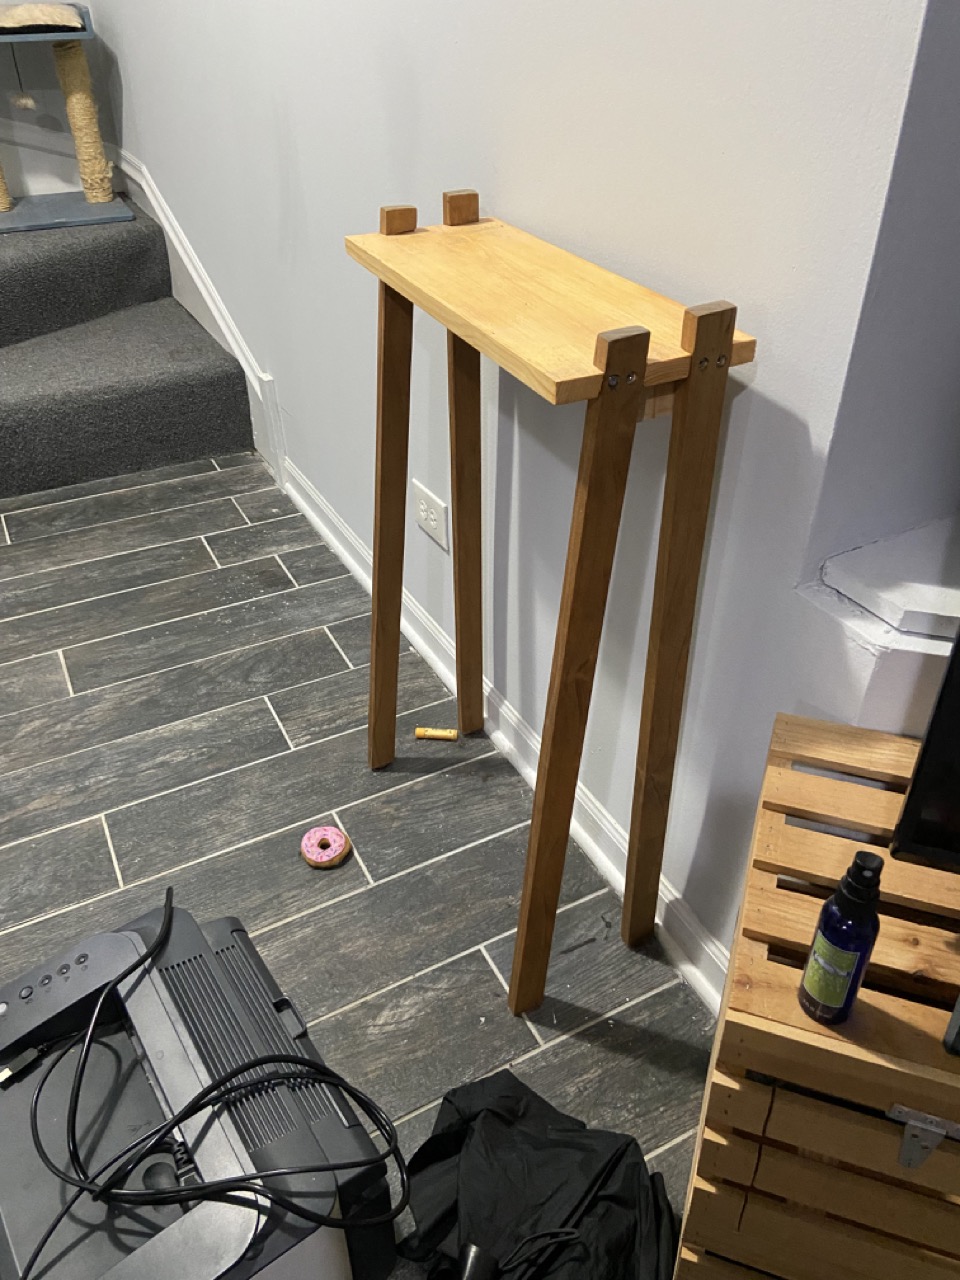
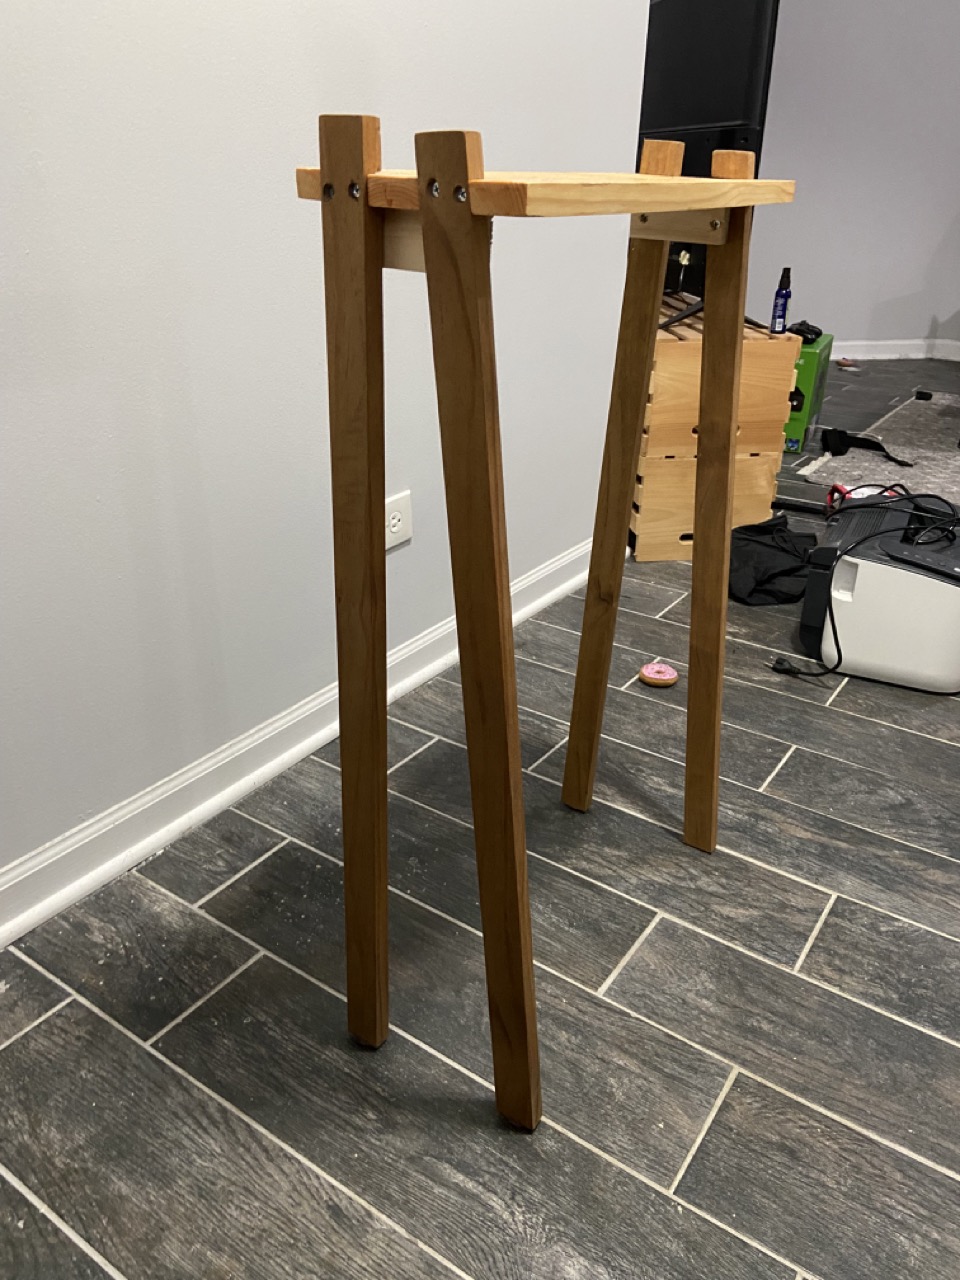
Entry Table (~2020)
This was one of my first projects of opportunity, in that I lived in a one bedroom apartment and had leftover scraps from the printer cabinet project, and decided to make a cute, albeit not particularly structurally sound entry table. This used a combo of the leftover stain + poly from the printer cabinet, and danish oil for the legs.
Learnings!
- How to (poorly) chisel half-laps
- How to (poorly) do angled legs
- How to use Danish oil (and that I like it more than stain + poly, but less than water-based poly)
I kept this until it was scrapped prior to moving in 2022.
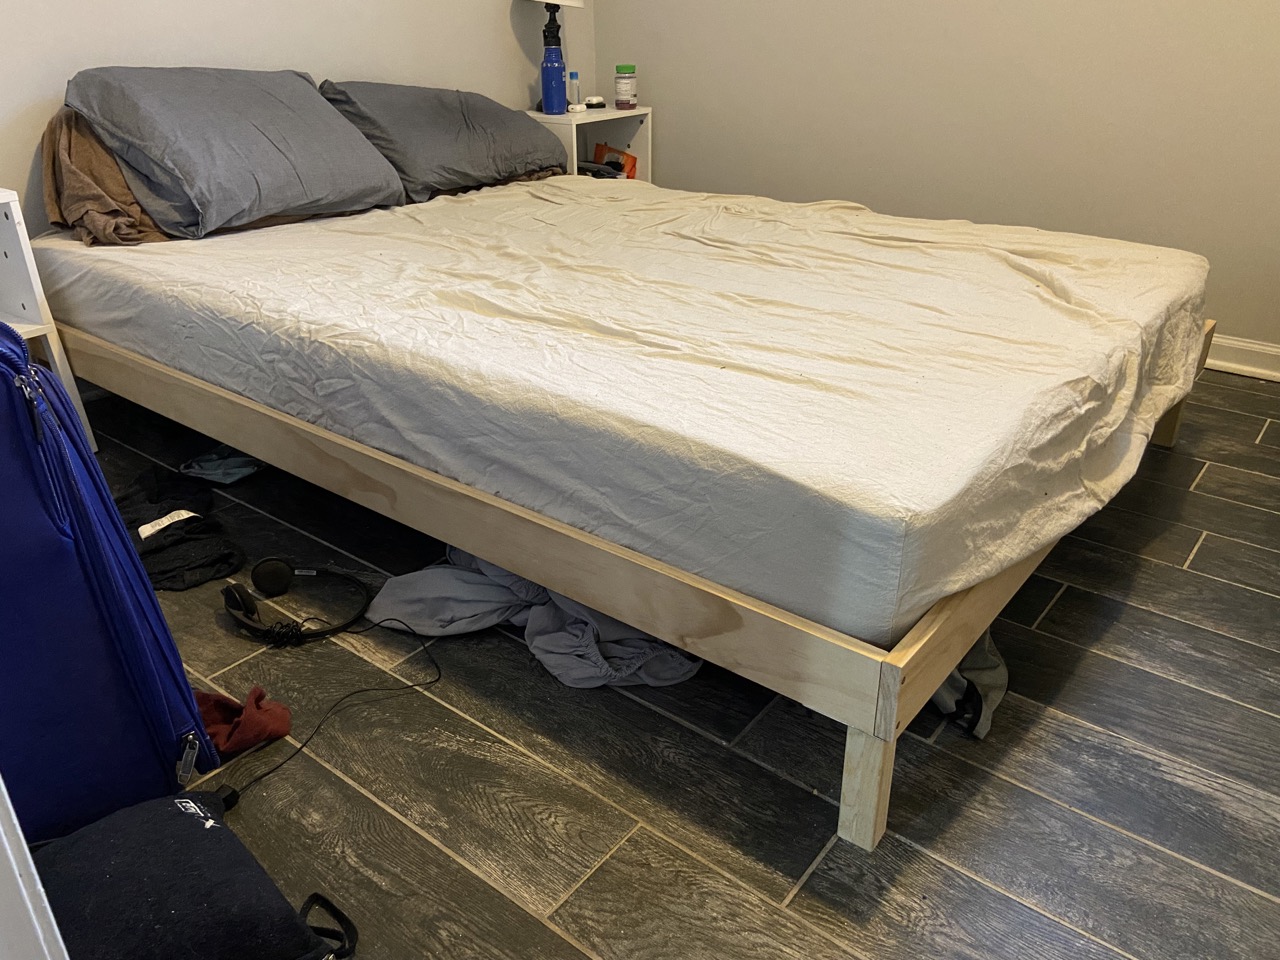
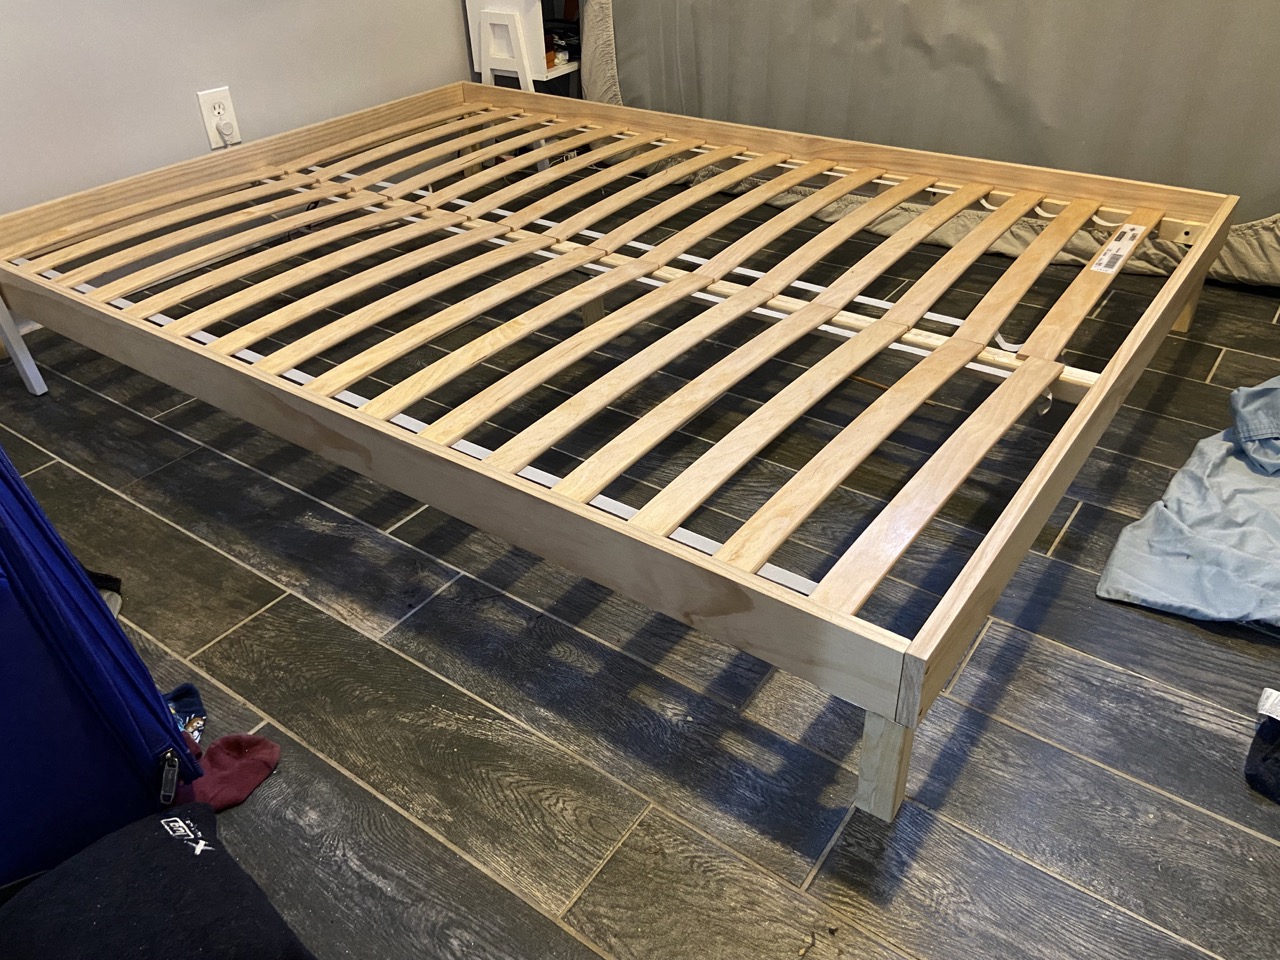
Bed (2021)
I hated my old bulky Ikea bed and committed to not moving with it, so when I moved apartments in 2021, the Ikea bed stayed behind (in the dumpster, mostly.) I did keep the slats, however. And so, I needed a bed! And built a relatively straightforward full-size frame. This was a platform frame in pine, with legs bought from Home Depot, and leftover Ikea wooden slats. It is fully unfinished (never even glued together! Just screws!)
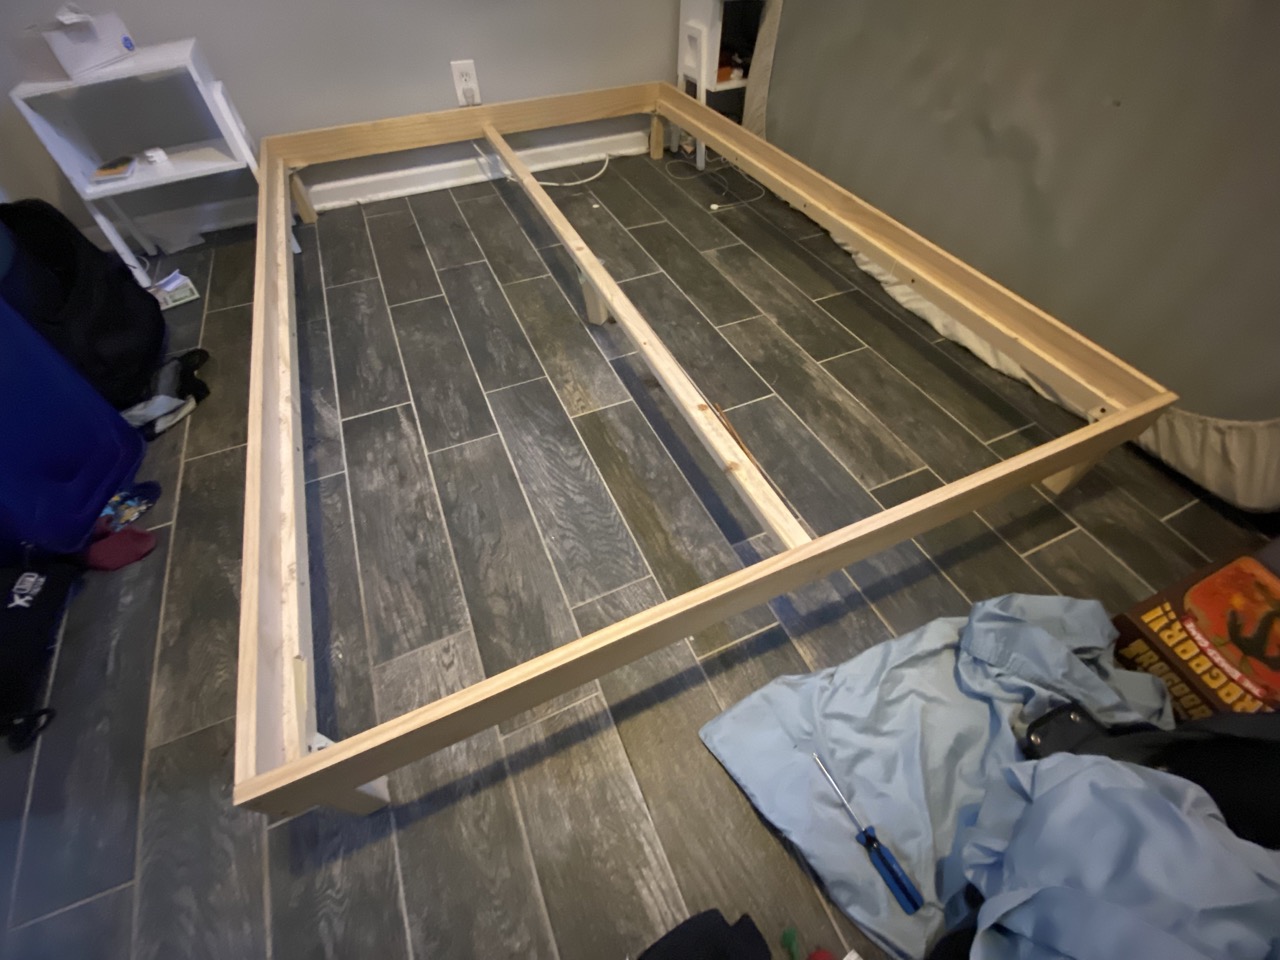
Learnings
- How a bed basically works
- That if you ever move a piece of furniture into its final setting for a "test assembly" and use it for more than 10 minutes without disassembling and moving it back out, it will never ever ever be disassembled, glued, stained, or finished
I kept this until it was scrapped prior to moving in 2022.
Desk (2021)
This is the first iteration of a desk that will re-appear later on the list. The desktop is 3/4" birch plywood in a 2'x4' project panel, edge banded, and stained I believe in a cherry of some kind. The legs are 1"x3" pine, stained in ebony. The whole thing is finished with water-based wipe-on polyurethane.
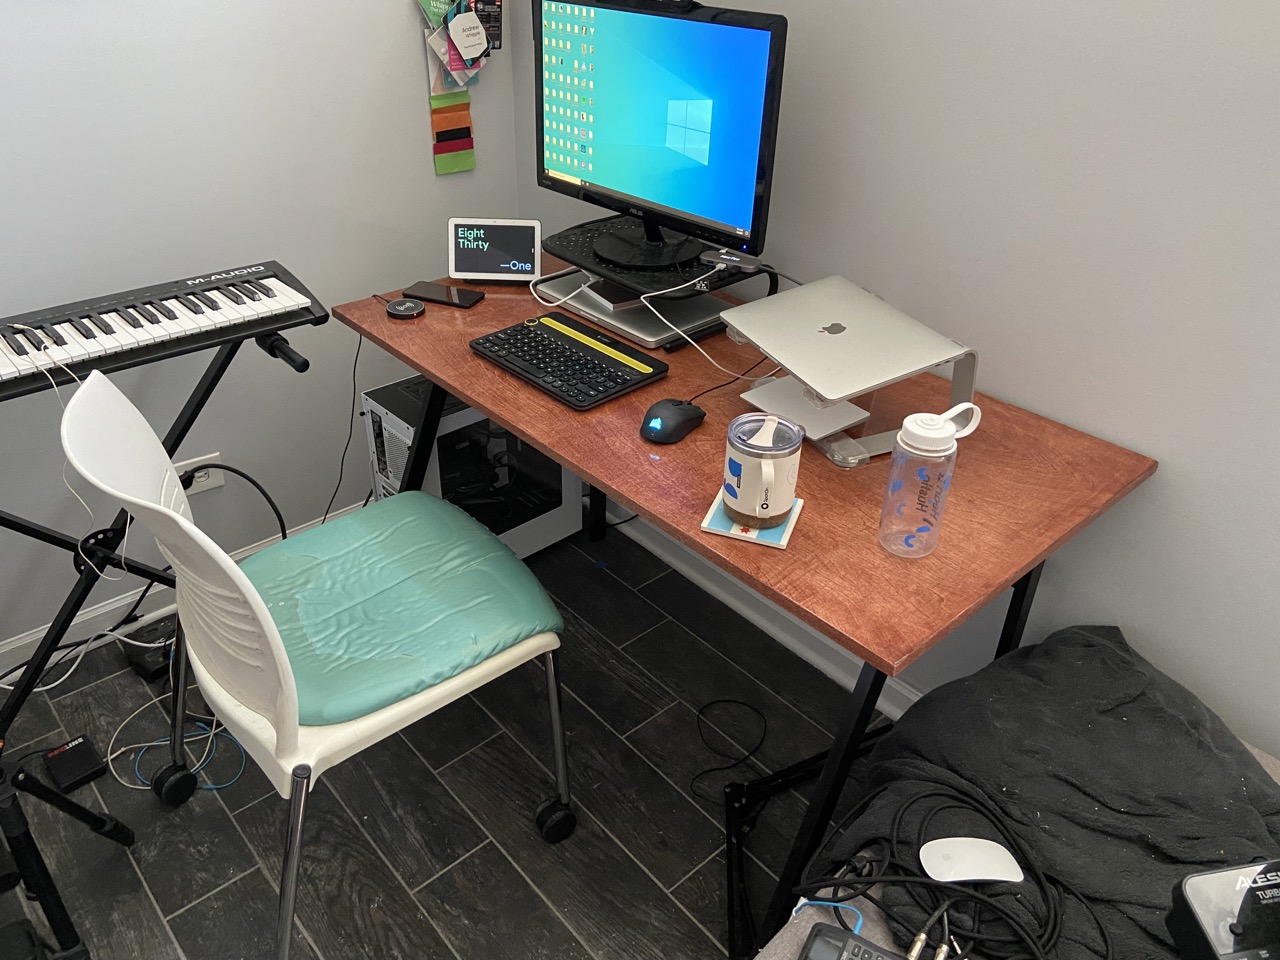
Learnings!
- How to use edge banding
- How to use wipe-on poly (and in the rankings, it's water-based > danish oil > wipe-on > combo stain + poly)
- How to build a desk
- How not to build legs, if you don't want your desk to wobble (specifically that aprons and stretchers would be useful)
The legs were detached and scrapped prior to moving in 2022, and the desktop is covered later.
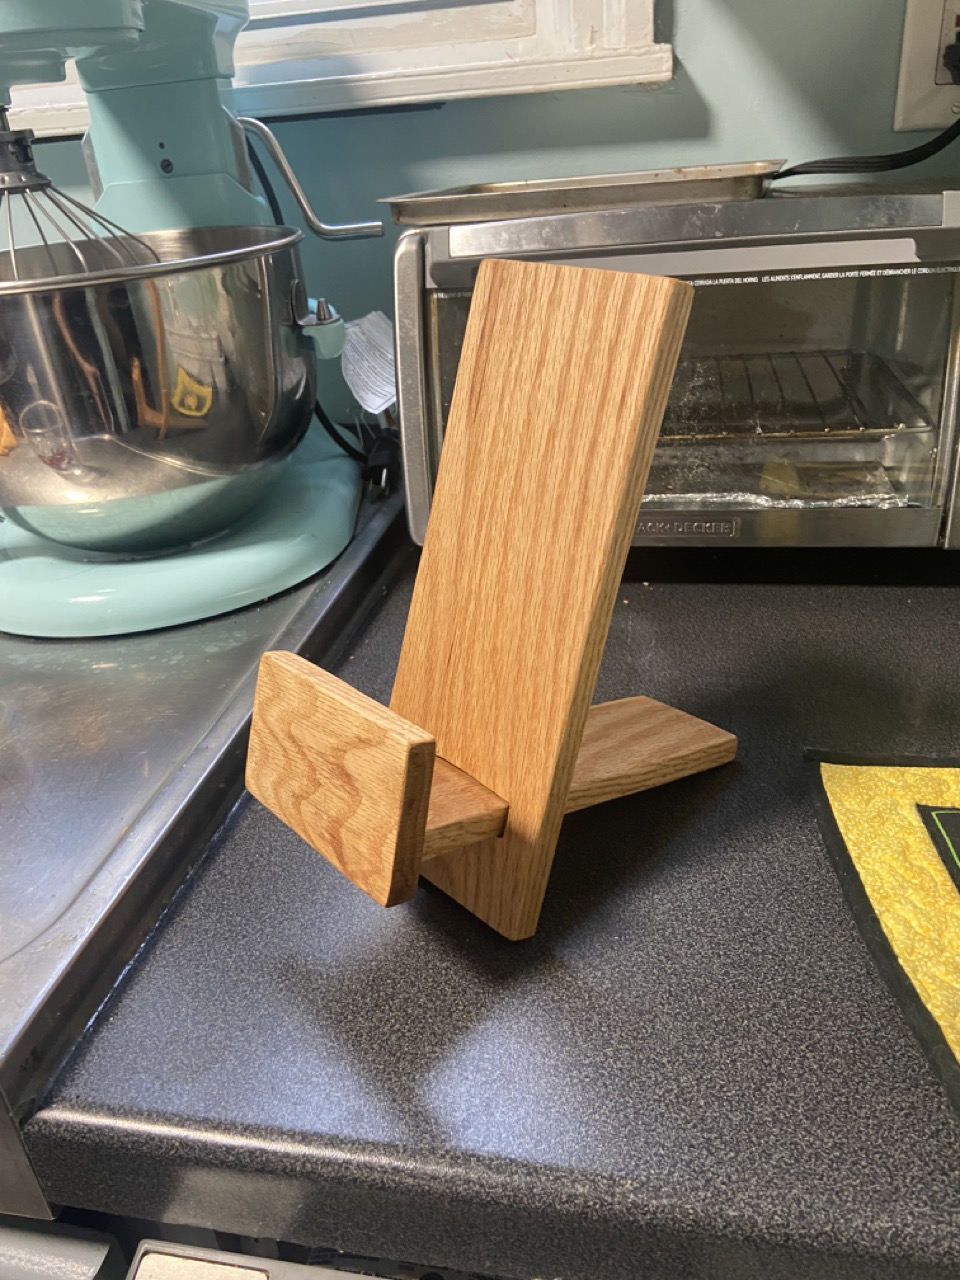
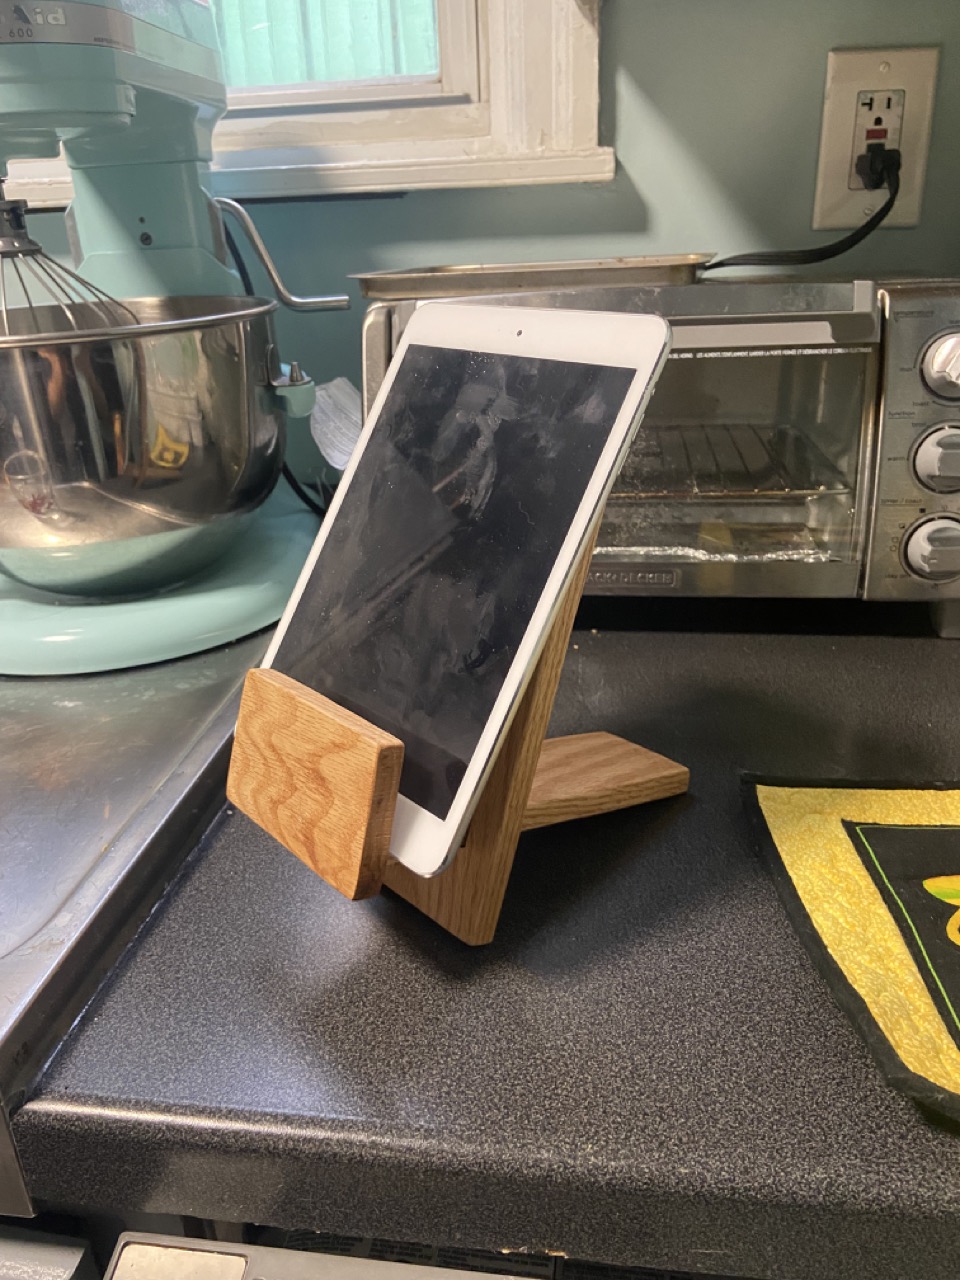
Cookbook/Tablet Stand (2022)
A little prototype (the 3rd, because the first two used a different design that failed spectacularly) for a cookbook/tablet stand I was considering making as Christmas presents. That didn't totally pan out, and I'm not thrilled with this, but it is useful! The piece is made from 1/2" red oak, finished with neutral danish oil.
Learnings!
- Start learning to use a jigsaw
- How to pivot when a prototype goes disastrously
- That I'm still bad at cutting straight 90° angles
This is still in use as of writing.
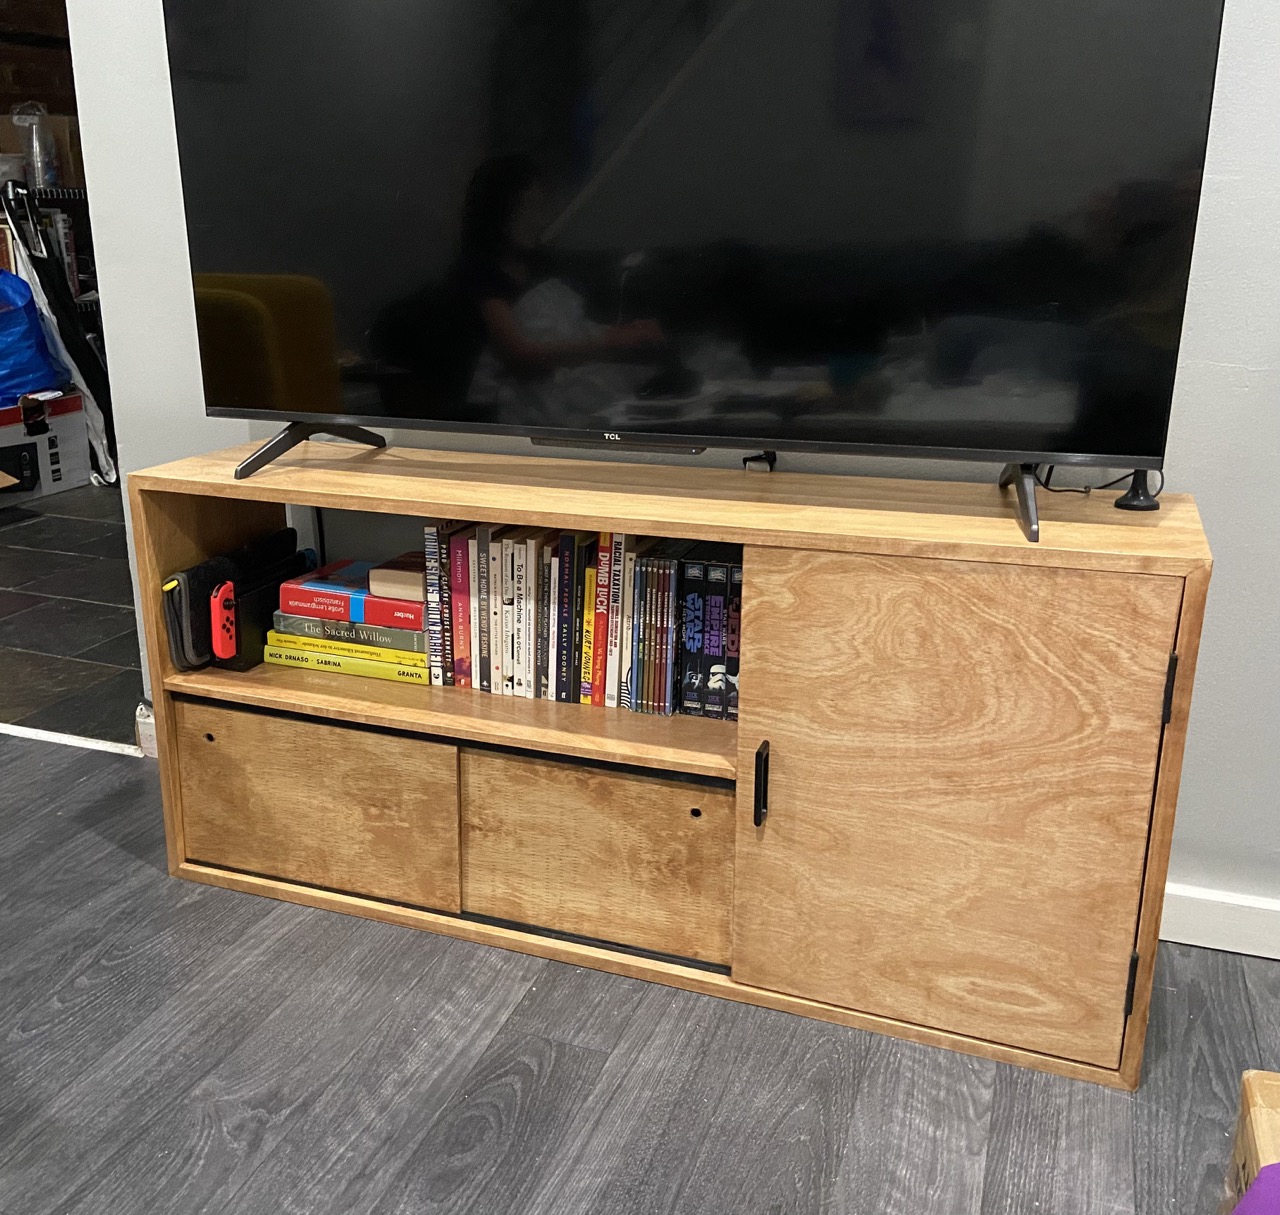
TV Console (2022)
We went far too long without a TV stand of some kind, instead having our tv barely off the ground on an old filled cardboard box, so this filled that void! It's an open-back cabinet, all made with birch plywood, with 3/4" for the main carcass, 1/2" for the shelf/partition/door, and 1/4" for the sliding doors on the bottom shelf. It's stained in special walnut, and finished with water-based polyurethane.
Learnings!
- How to (poorly) use a circular saw
- Special walnut stain is lighter than I think it is
- How to use pre-stain conditioner
- Faking miters with edge banding absolutely doesn't work
This is still in use as of writing.
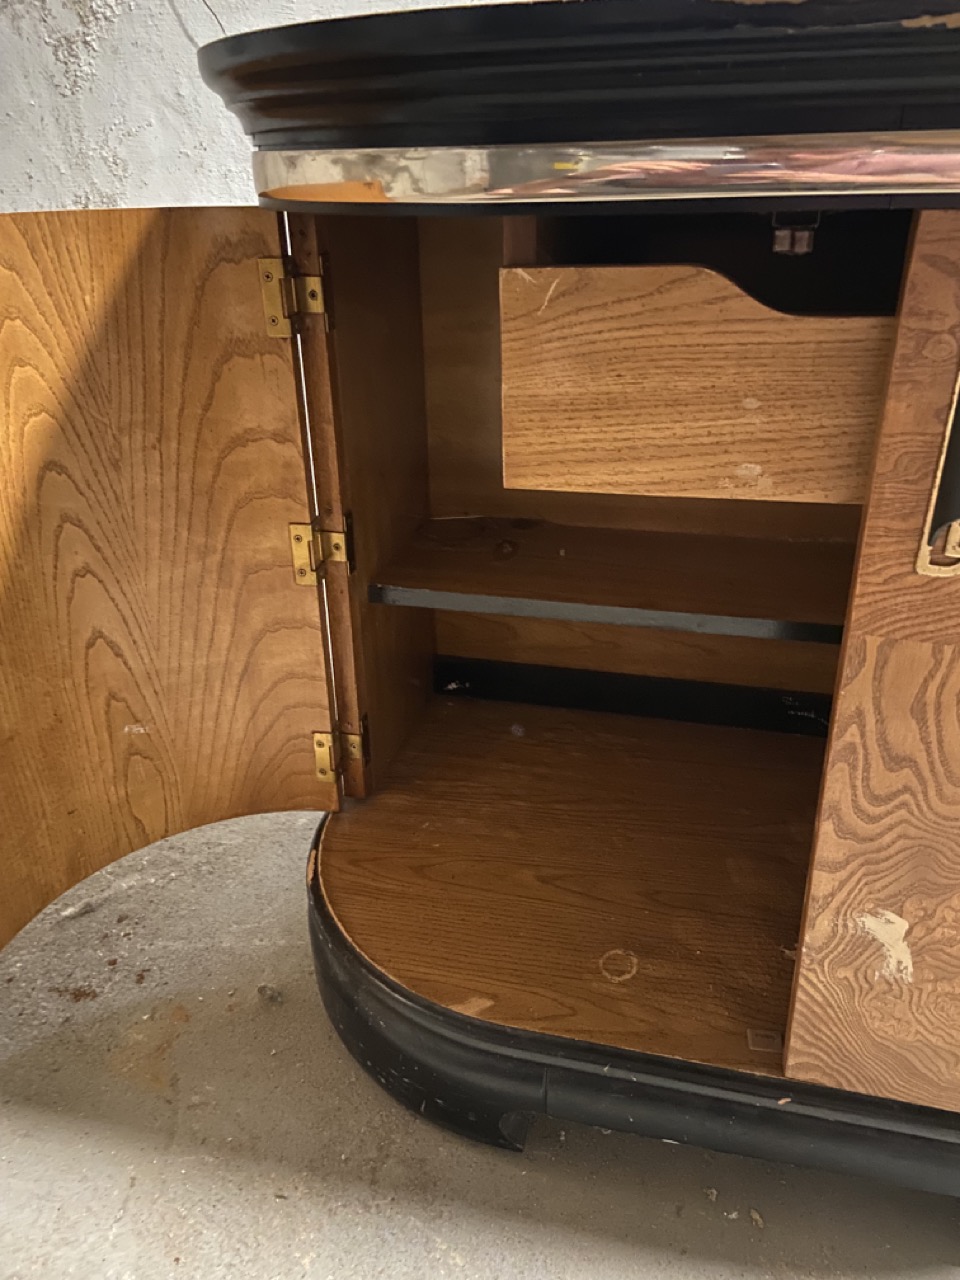
Liquor Cabinet Refurbishment (2022)
Not strictly a woodworking project, but this was a buffet cabinet on sale for $20 at a local thrift store, primarily because the exterior finish was bad and there was tons of water damage on the MDF on the inside. This was a so-so restoration, but did end up cleaning the piece all over, fully refinished the top, repainted most of the trim, sanded off the water damage from the base and interior shelf, "refinished" the interior shelf with black vinyl and the base with black paint and black felt, and re-hung the loose door. And all in all it makes a pretty okay little liquor cabinet! I may do more with this in the future.
Before

After

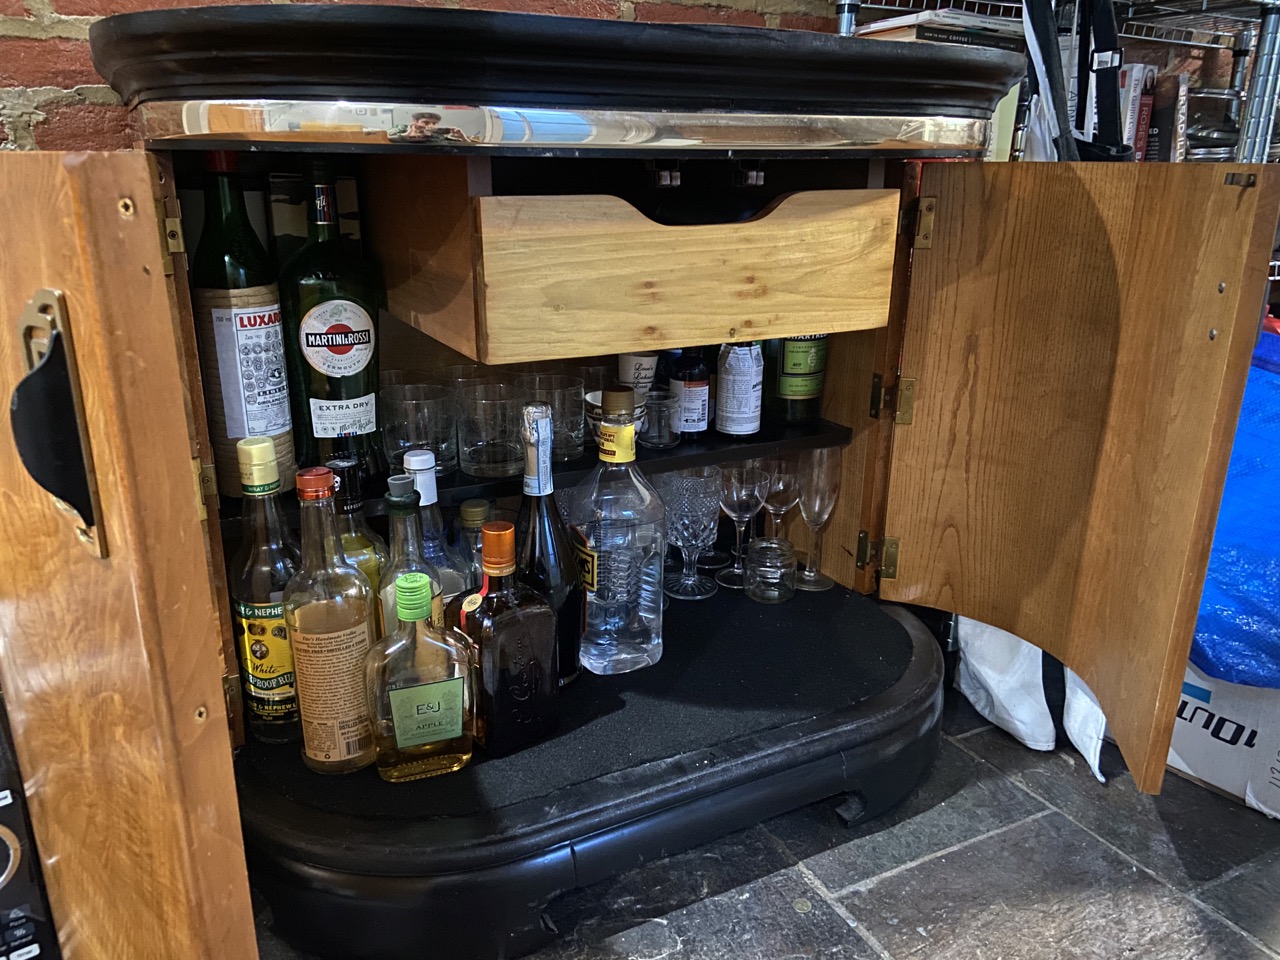
This is still "in use" as of writing, though in storage.
Scratching Post (2022)
A little project to build a custom scratching post to hang off our stairs. This was pretty slapdash, being some offcuts of 3/4" plywood, painted with leftover black paint from the refurbishment, and wrapped in sisal rope that was hot glued and stapled to the wood.

This was scrapped prior to moving in 2025.
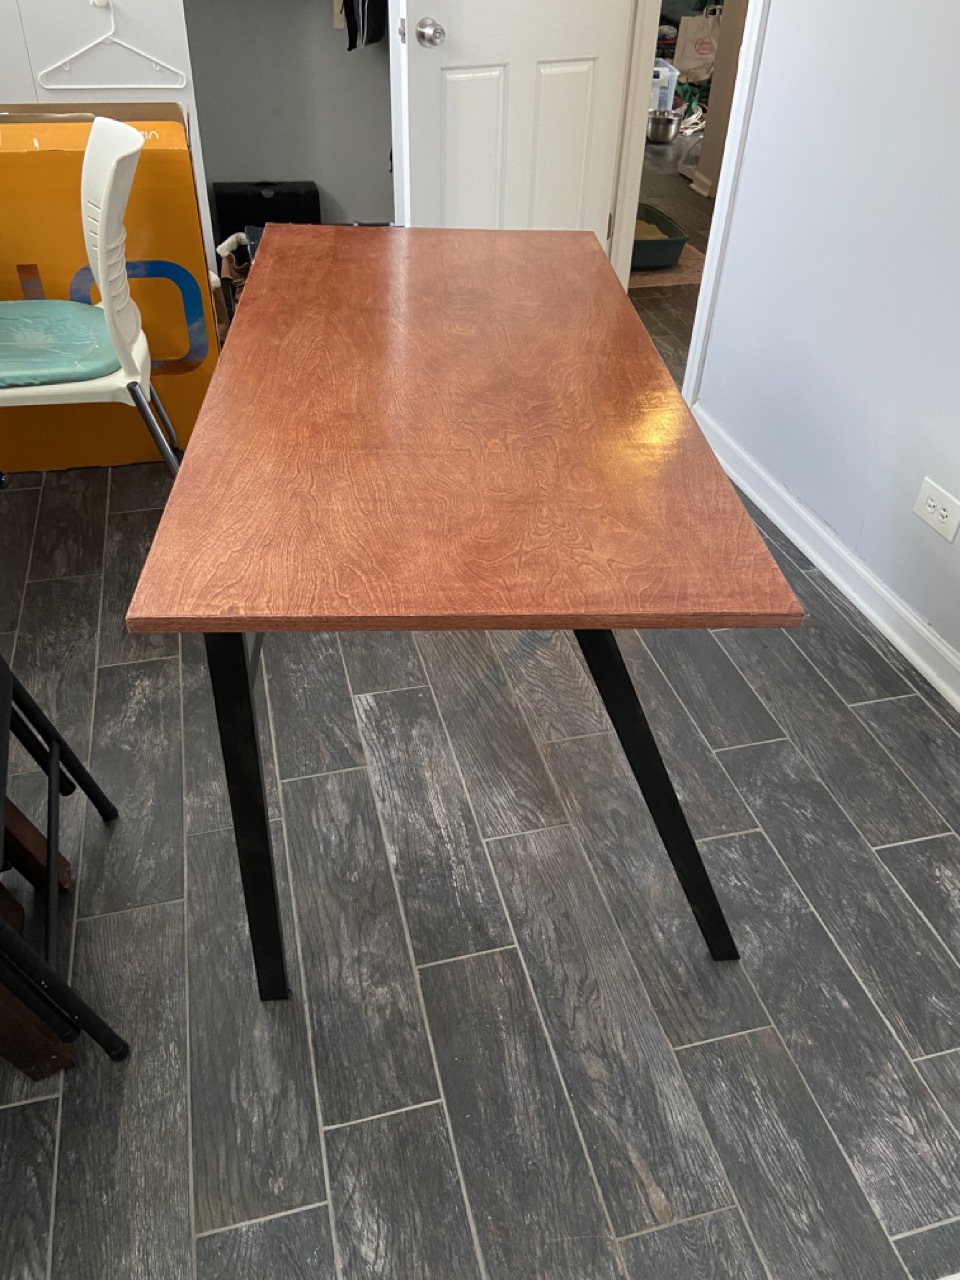
Desk Legs V2 (2022)
As mentioned above, the desktop made the move to Philadelphia, but the desk legs did not, and so new ones had to be made. And with the benefit of having done it the first time, I made a few modifications to the design:
- The legs are thicker (2"x2")
- The have much more substantial aprons
- As both a design and a practical feature, the side aprons have cutouts for cords and such
The legs are stained in ebony and finished in neutral danish oil.
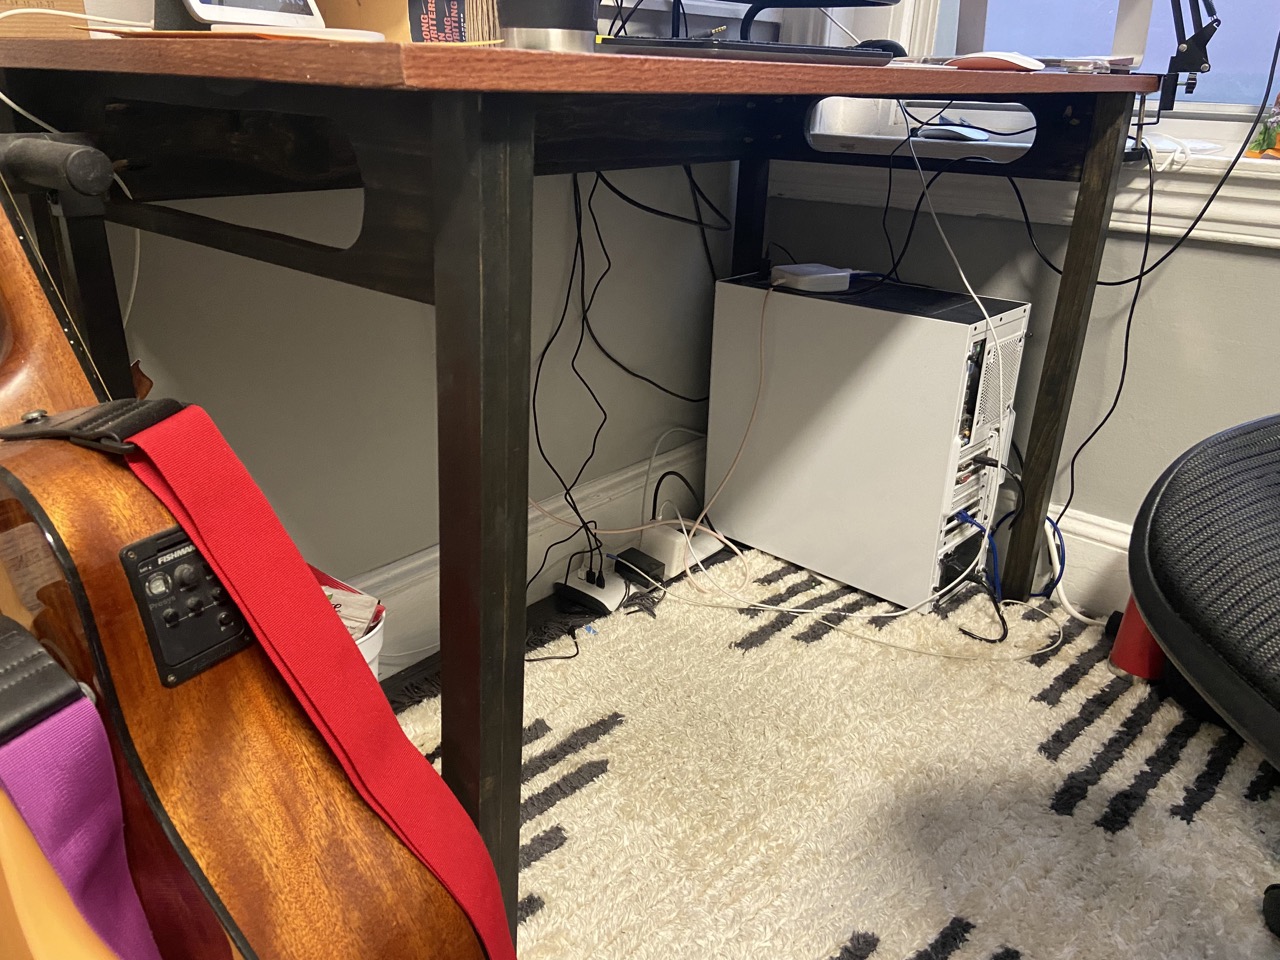 (The top is the same as before, and I didn't want to show off my messy desk)
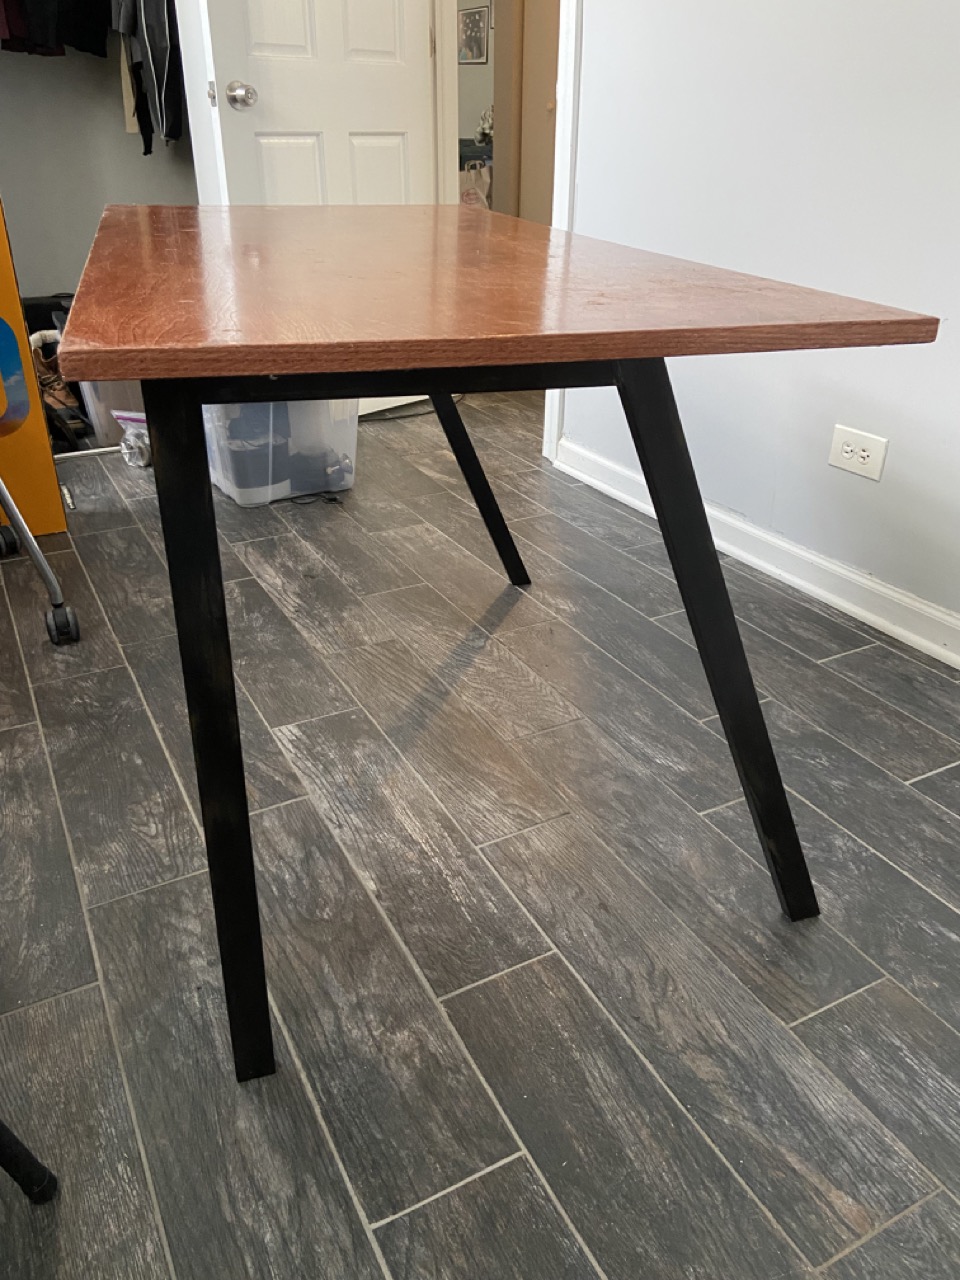
Learnings!
- How to get better at using a jigsaw
- Ebony stain looks bad after the first application, but better after subsequent coats
This, along with the desktop, were scrapped prior to moving in 2025.
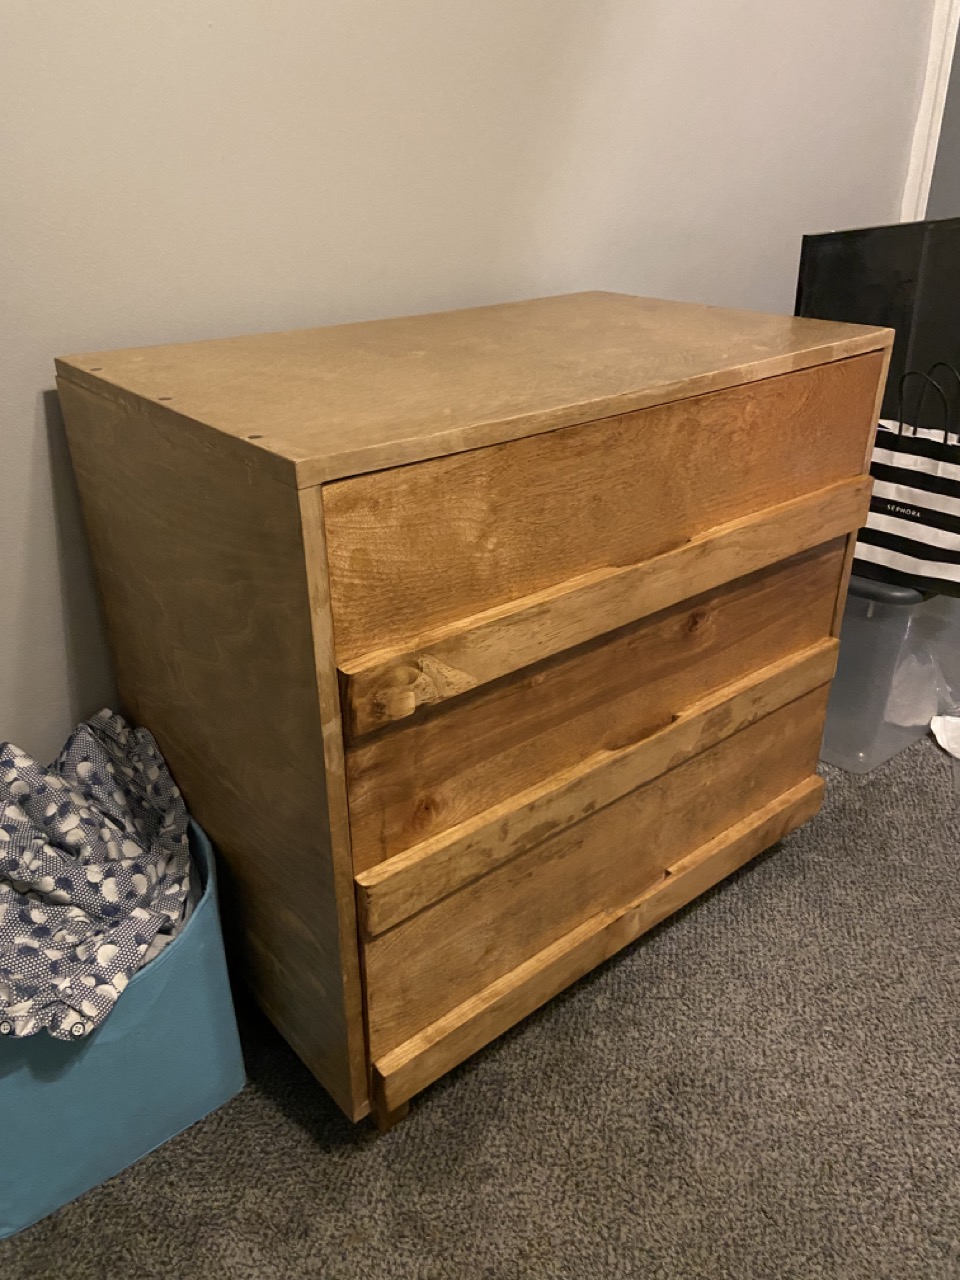
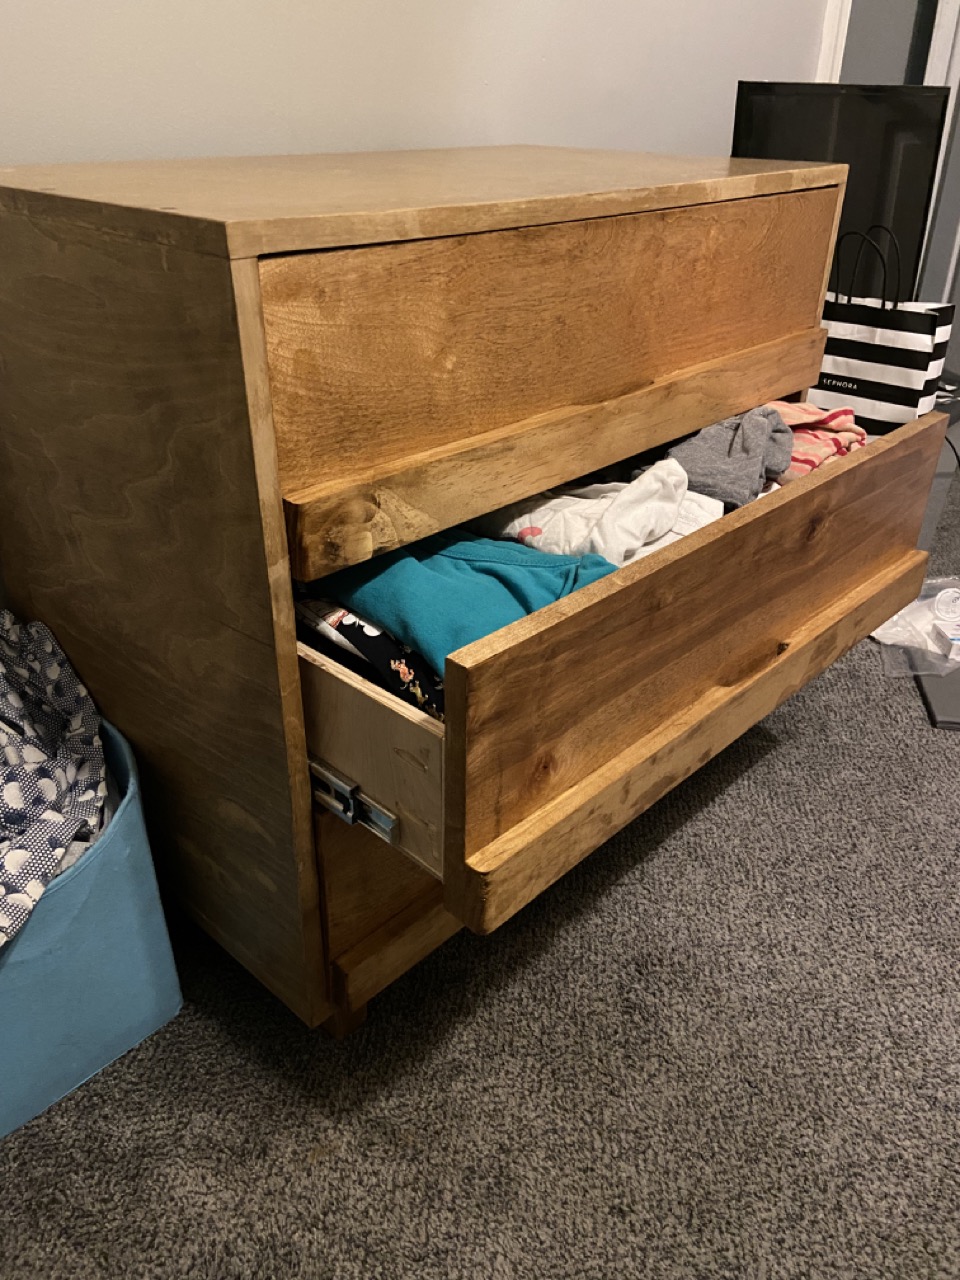
Dresser (2023)
Similarly to the TV console, for way too long post-move I did not have a dresser, instead using a combo of closet space, an old storage bench, suitcases, and honestly, the floor, as my clothing storage. This carcass of the dress is 24"x30"x18" (HxWxD) and made out of 3/4" birch plywood, joined with glue and dowels. The drawer boxes are a combo of 1/2" plywood for the boxes, and 1/4" for the bottom, with the boxes joined with pocket holes and with glue + staples to attach the bottom to the box. The drawer faces are 3/4" birch plywood with a handle chiselled and sanded from 1"x3" pine. It's stained in dark walnut and finished with water-based polyurethane. The drawer slides are bought from Home Depot.
Learnings!
- How to use dowel joinery/my dowel joining jig
- Chisels work better for trimming edge banding than razer blades, at least for me
- How to build drawer boxes
- How to install drawer slides (and how to compensate for doing a bad job building and measuring the carcass + drawer boxes to fit the slides)
- Hand planing long proud joints is faster and easier than trying to use a flush trim saw
- A staple gun + mallet works for pinning 1/4" plywood, but a brad nailer would probably be better
- A table saw or better straight edge guide should be high on my list of next investments
- Design elements can sometimes help recover from sloppy proportions (in this case, drawers sitting unevenly when mounted making the drawer fronts look out of whack, which is barely noticable given the placement and size of the handles)
This is still in use as of writing.
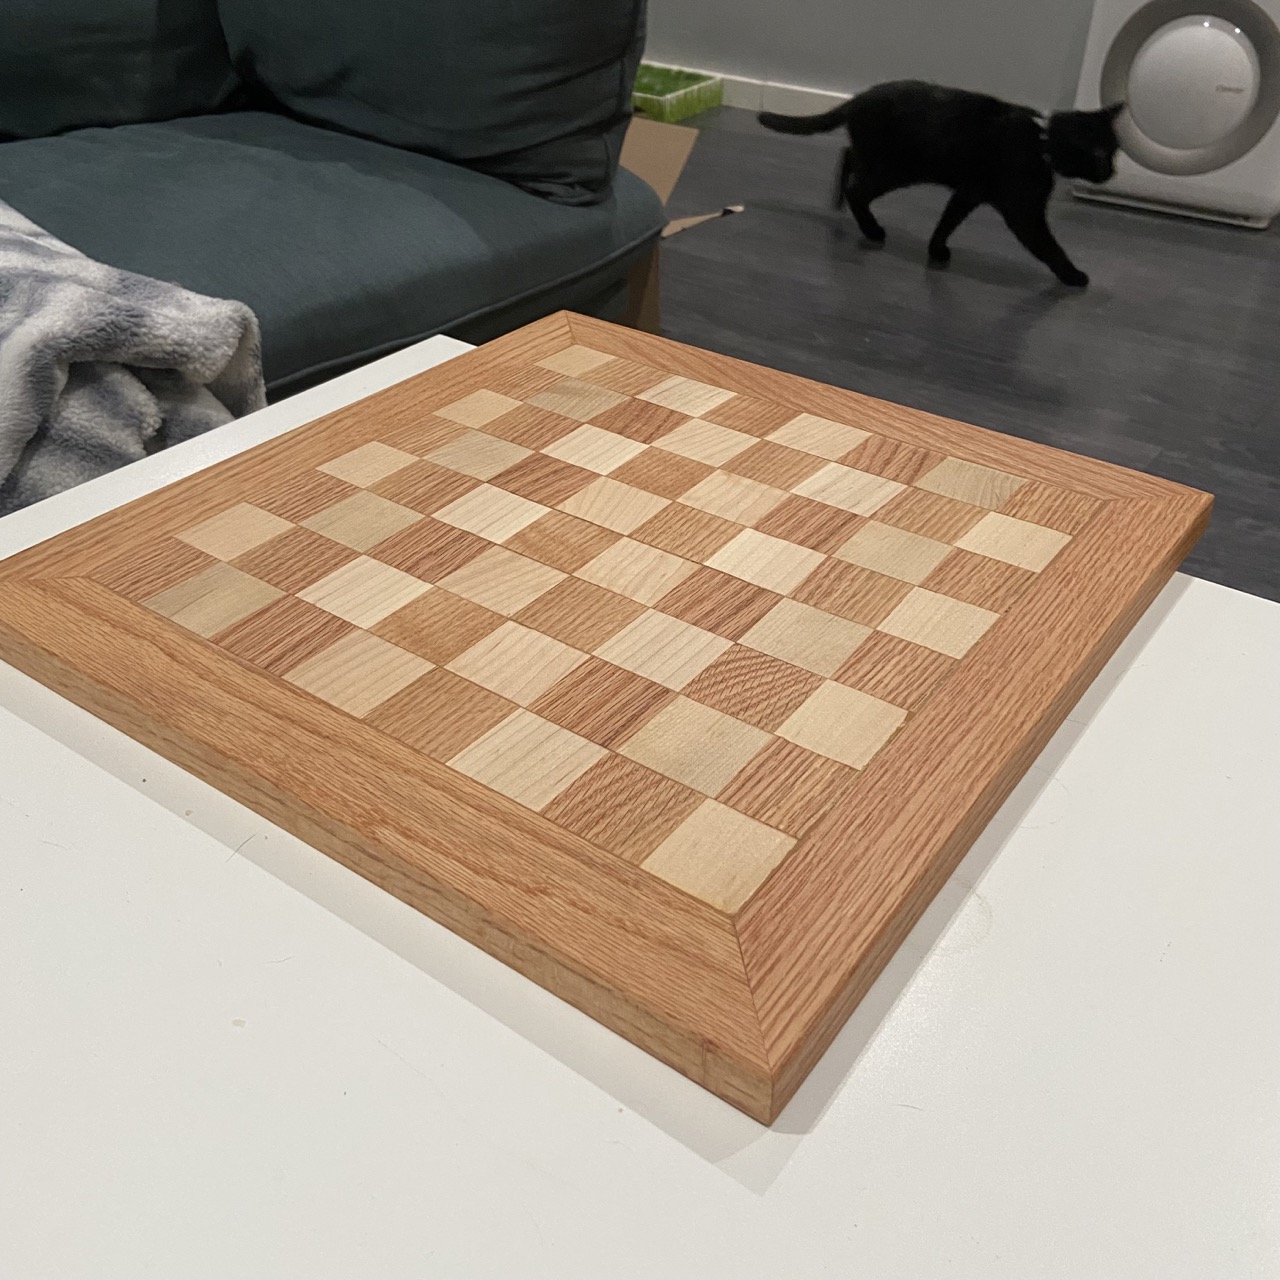
Chessboard V1 (2023)
A prototype/first attempt at making a chessboard! This is made from red oak and maple, with the top being 1/4 inch strips of the hardwood laminated over a 1/2 inch core of plywood, and then the edge made from red oak. The whole thing is finished in danish oil in natural.
Learnings!
- This overall construction approach of thin hardwood laminated on plywood totally works
- How to get better at cutting miters by hand
- More practice with a hand plane
- That I need to get muuuuuuuch better at cutting straight by hand, or otherwise wait until I get a table saw, before I ever attempt making a chess board or anything else as dependent on straight cuts and 90° angles for someone other than myself
- First attempt at using a router for anything (in this case the tiniest chamfer on the top edge)
- Keep an eye on the colors of the wood you're using, especially the maple in this case, to avoid the mix and match between strips of really pretty light maple and uglier grayish ones.
This is "in use", in that it is being used as a riser for my 3d printer.
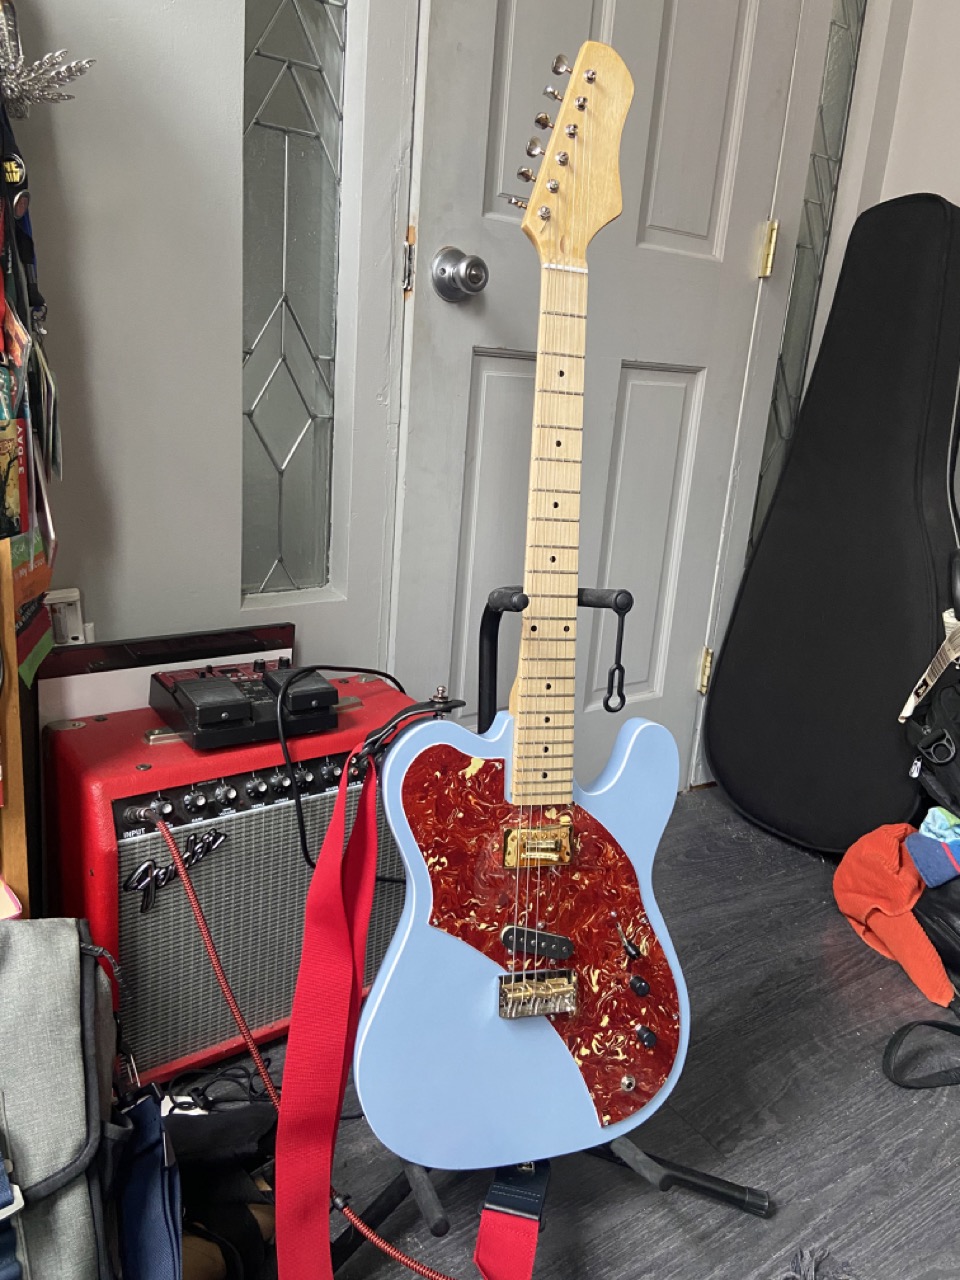
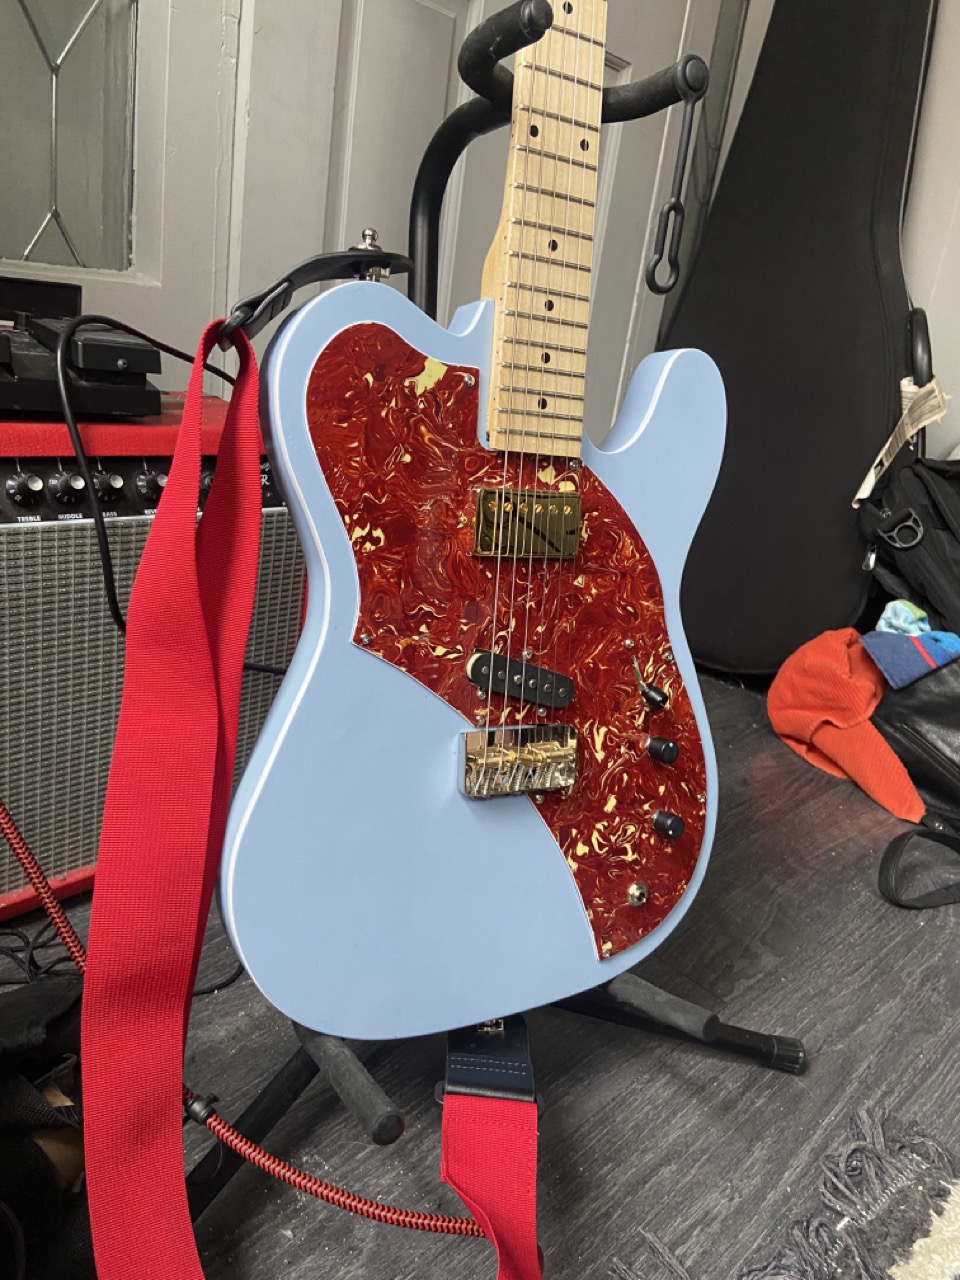
Guitar - Telecaster style #1 (aka "Self-Titled", 2023)
First time building a guitar! I'm calling this Telecaster-style build the "TS1", or "Self-titled." The neck is pre-made with a half-paddle headstock that I cut to final shape, from Solo Guitars. The body is poplar, with a white acrylic binding, with the shape based off an existing Squier Telecaster I've had for roughly four thousand years. It's finished in hardware-store acrylic enamel spray paint, which looks okay at a distance but ehhhhhh up close. The pickups are both from Tonerider: the neck is an Alnico IV Classic humbucker and the bridge is a Vintage Plus single-coil Telecaster style, wired in with a 3-way switch and 500k volume and tone pots. Most of the hadrware is all from Allparts.
It sounds nice! I particularly like it in the middle position (the neck is perhaps too boomy for my taste, but it plays very nicely with the bridge.) The volume knob makes it clean up a lot just going from like 10 to 9, and it seems to sound at its best when strummed aggressively; I feel like this is going to be a very fun rhythm guitar.
Learnings:
- How an electric guitar is built!
- How to apply binding to an electric guitar (super glue works great!)
- How to recover from routing too deep a rabbet for your binding (just flush trim route the rest of the edge of the body to compensate!)
- That you should double-check bridge alignment after mounting the neck and before drilling any screw holes, in that I mounted the bridge based on the original center line and then mounted the neck and realized the neck pocket was off, and now the bridge was out of alignment (and so I had to re-drill and re-mount the bridge.)
- How electric guitar wiring works, and specifically how to do an HS (humbucker neck/single-coil bridge) 3-way switch/single volume/single tone knob wiring
- How to solder
- That there are different kinds of guitar output jacks for stereo vs mono, but fortunately it (seems like) accidentally using the stereo one but wiring it for mono works fine 🤞
- The overall process for finishing an electric guitar
- That shellac seems to work okay as a sealer/grain filler
- To take seriously the timing listed on any paint can, specifically if it says "apply additional coats within X hours or after Y hours" to not try and touch up or repaint within that X to Y timeframe, or else it'll react badly
- That I provisionally don't love acrylic enamel; looks-wise it's fine (particularly since I greatly prefer a more matte look than a high-gloss factory guitar sheen) but the actual finish is softer than I'd like. However, this is provisional since I want to see how it cures over weeks and months vs days.
- In future guitars I can go lighter on the color coat and heavier on the clear coat
- I don't know how yet, but I need to get better at aligning screw holes and mounting points for things like pickups
- Not all tuning pegs are sized for all (pre-made) tuning peg holes (in that the tuning pegs I bought are smaller and expect to be closer together than what's on the neck; whether this is An Actual Thing To Know, or just a margin of error thing on the part of the neck manafucturer, unclear!)
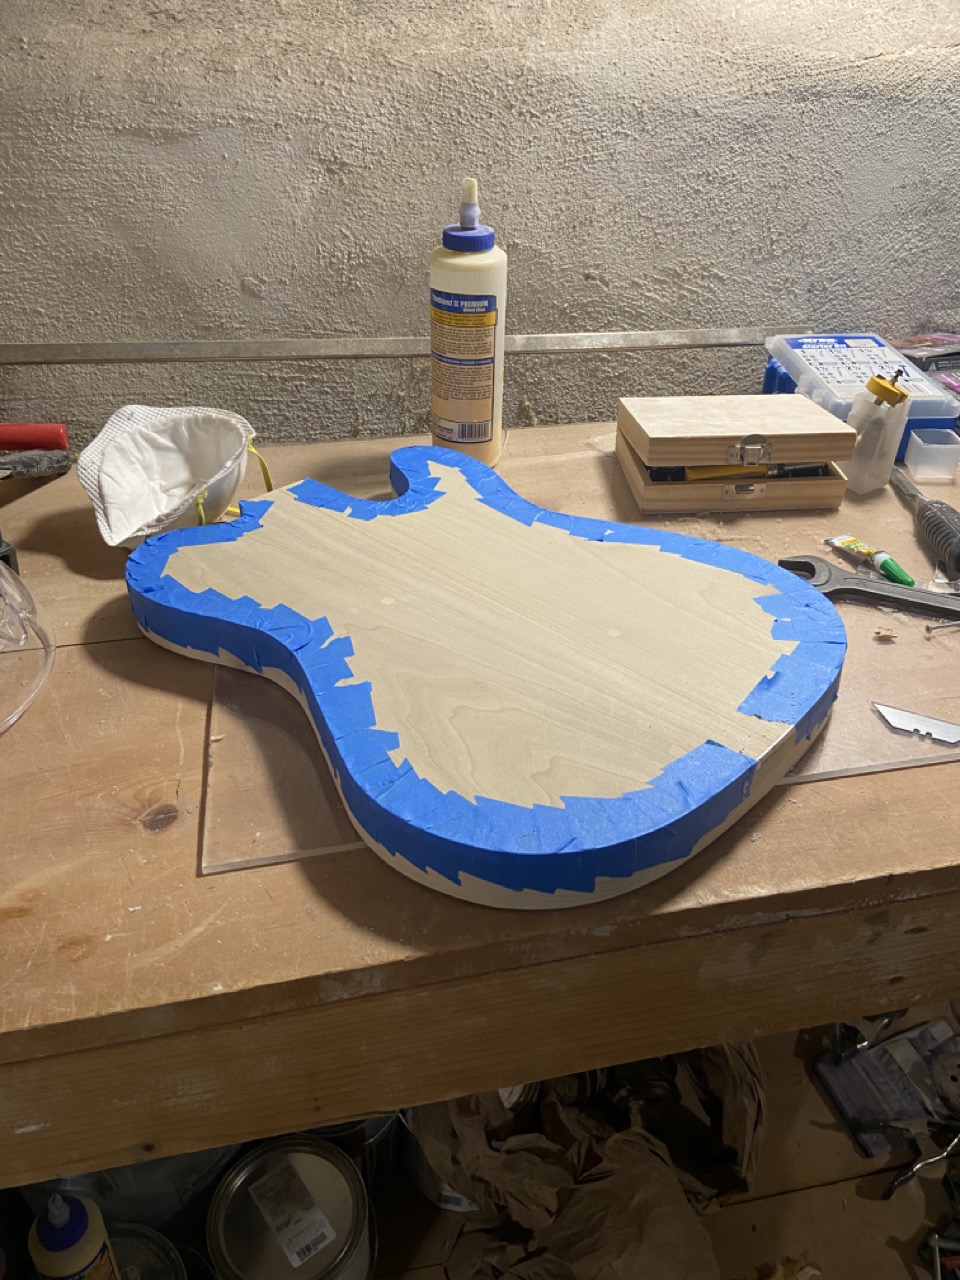
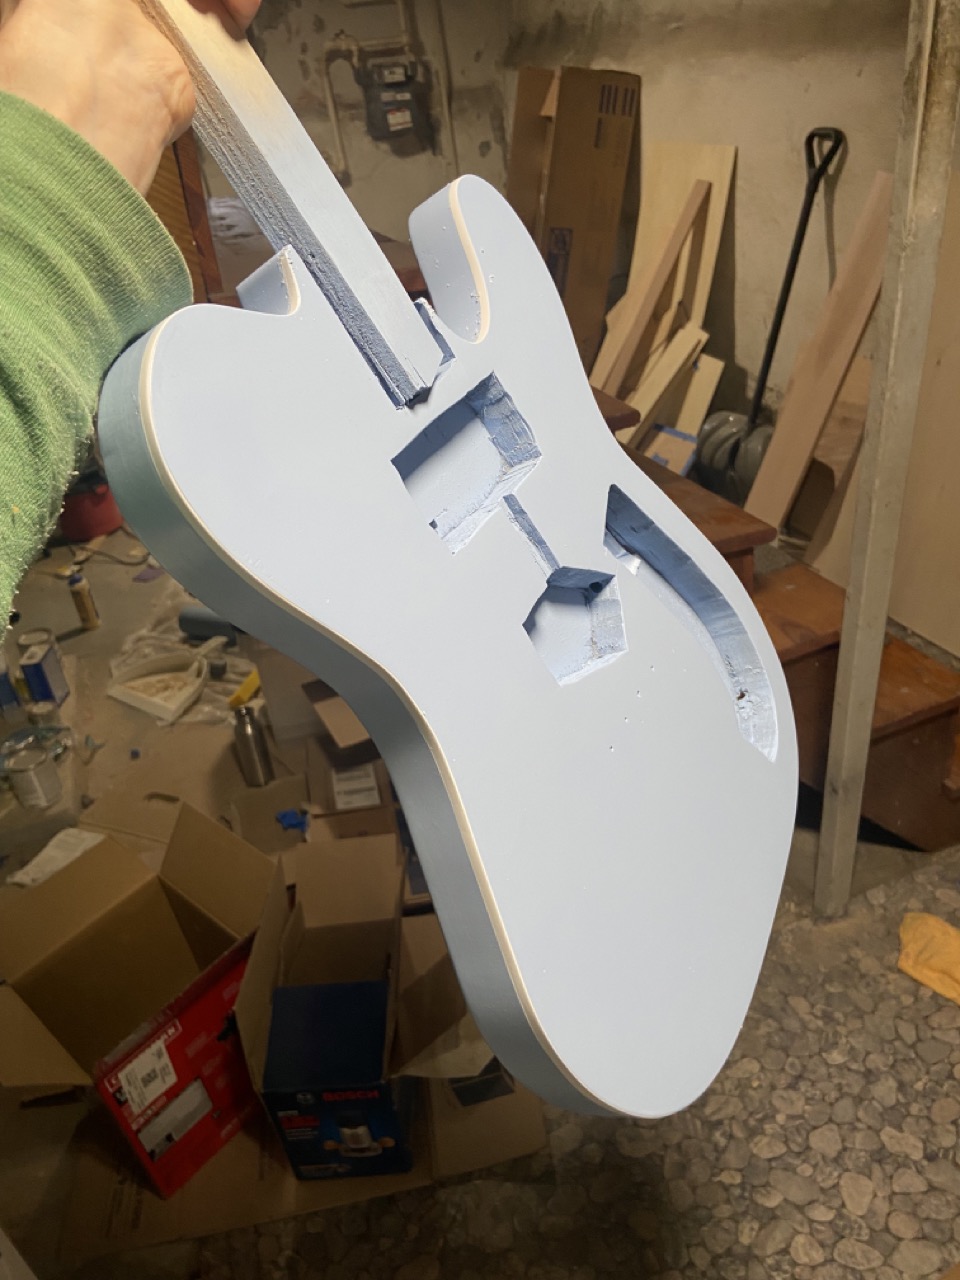
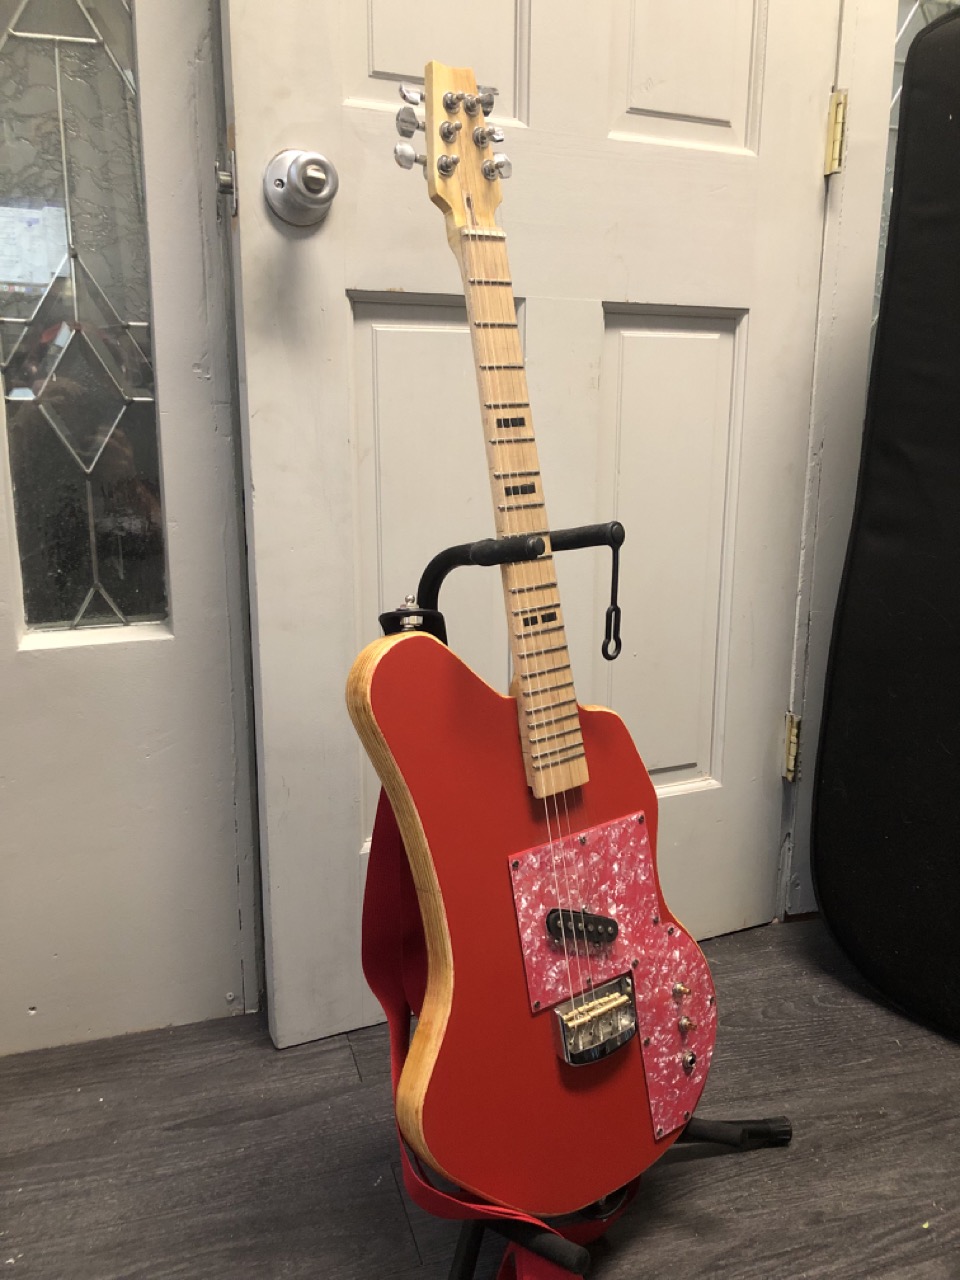
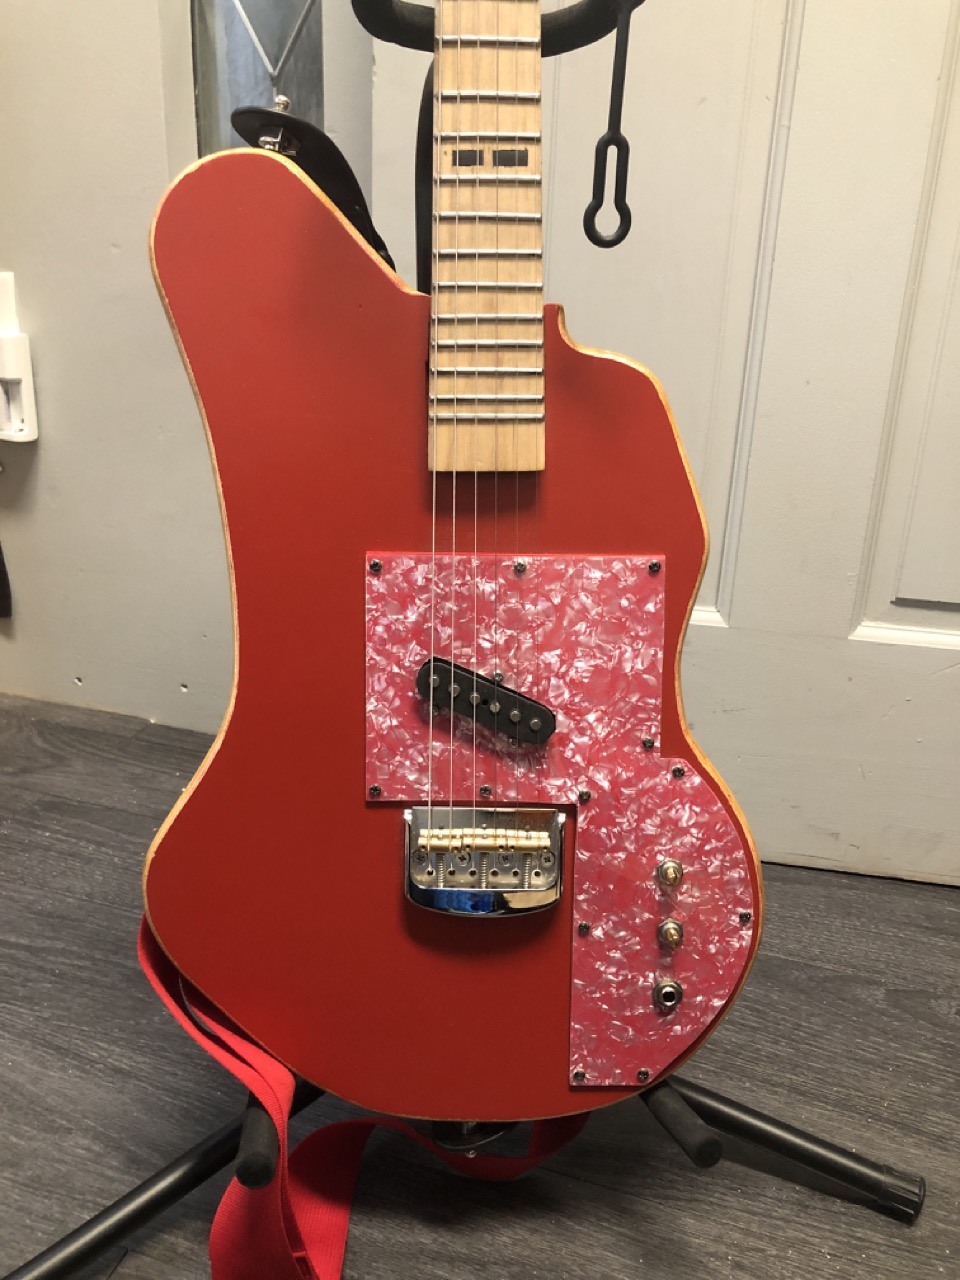
Guitar 2 - Original offset design #1 (aka "The failure", 2023)
Second guitar! This is a partial failure, in that it is my first guitar built entirely (minus the electronics) from scratch, including the neck and..... it shows. It's more or less playable below the 12th fret, but a complete mess above. The body is an original offset design made from maple plywood finished with water-based polyurethane, and the neck is all maple. It has a single Bareknuckle "The Boss" bridge pickup (kinda Esquire-inspired design for the guitar, but with just a single volume and tone rather than the Esquire switch wiring.)
In 2024 I remade the neck and it's much more playable now.
Learnings!
- First time attempting to design a guitar body from scratch; kinda works!
- That I like using plywood for guitar bodies (it's very light!)
- How to (poorly) build a guitar neck, specifically a one-piece neck
- How to (poorly) install and dress guitar frets
- That I greatly greatly prefer polyurethane finishes to acrylic enamel
- That if you don't want grain showing through painting on a plywood body you absolutely need a real grain filler
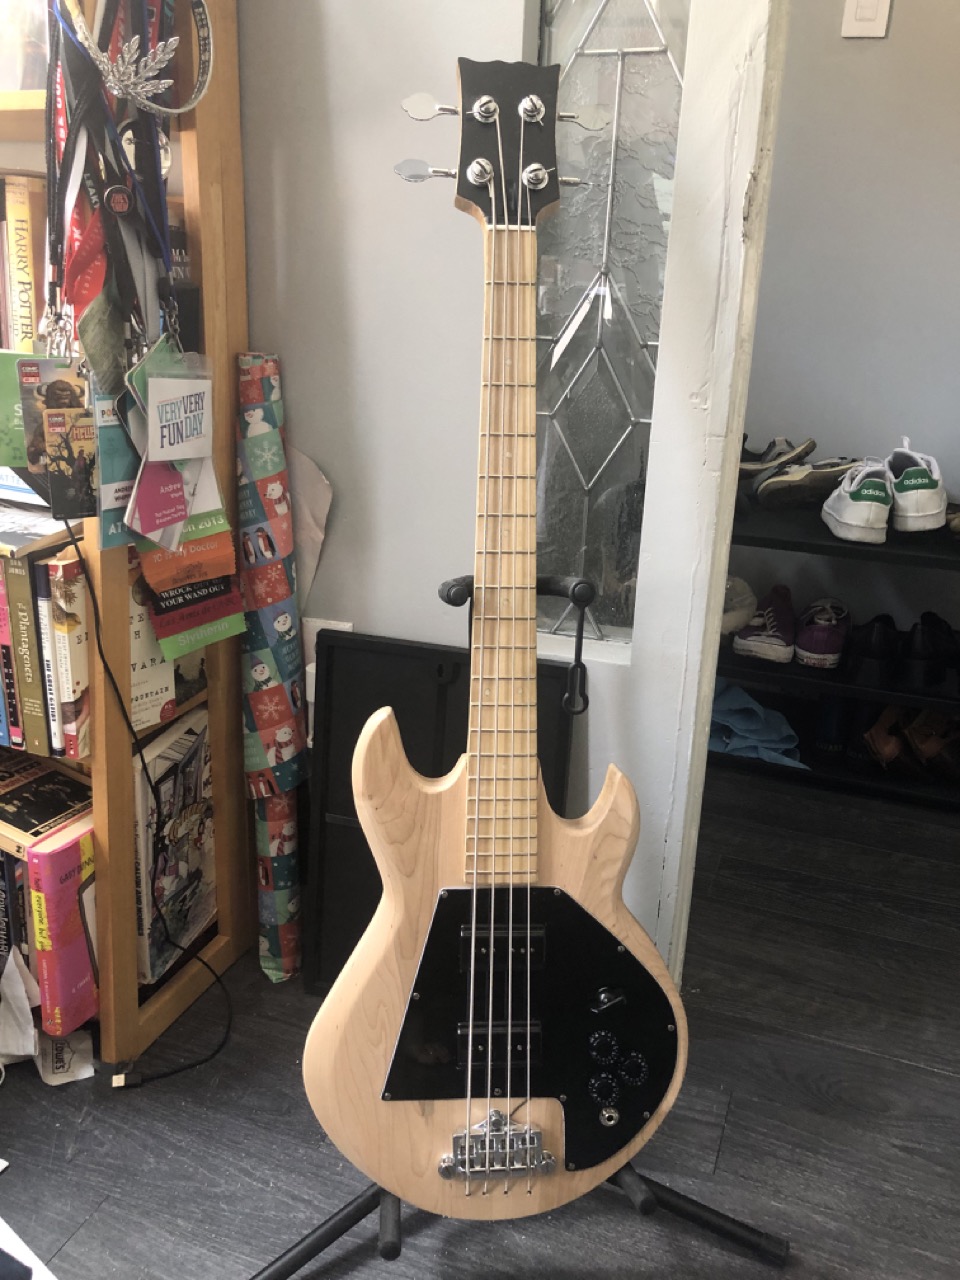
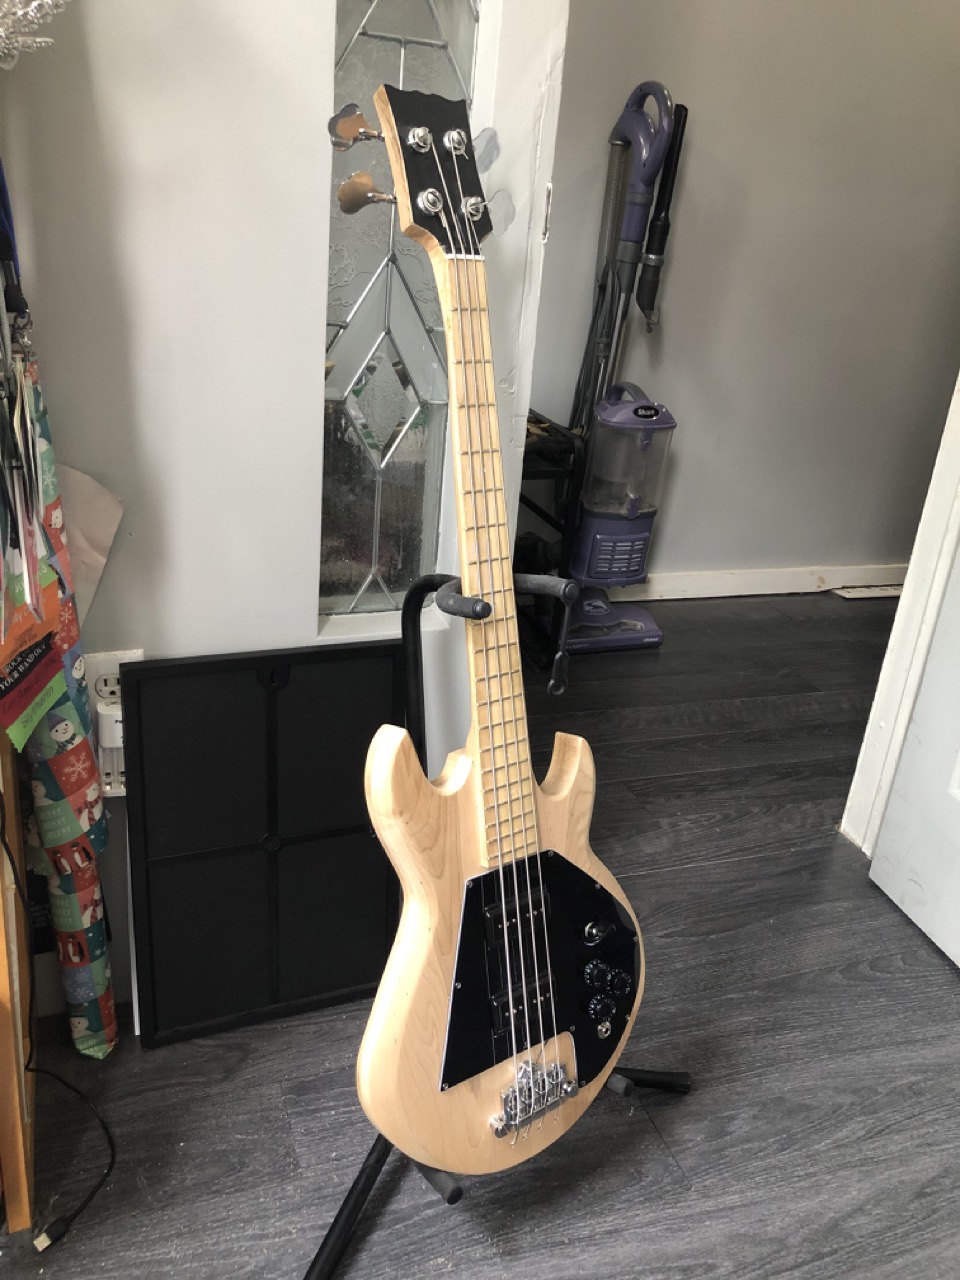
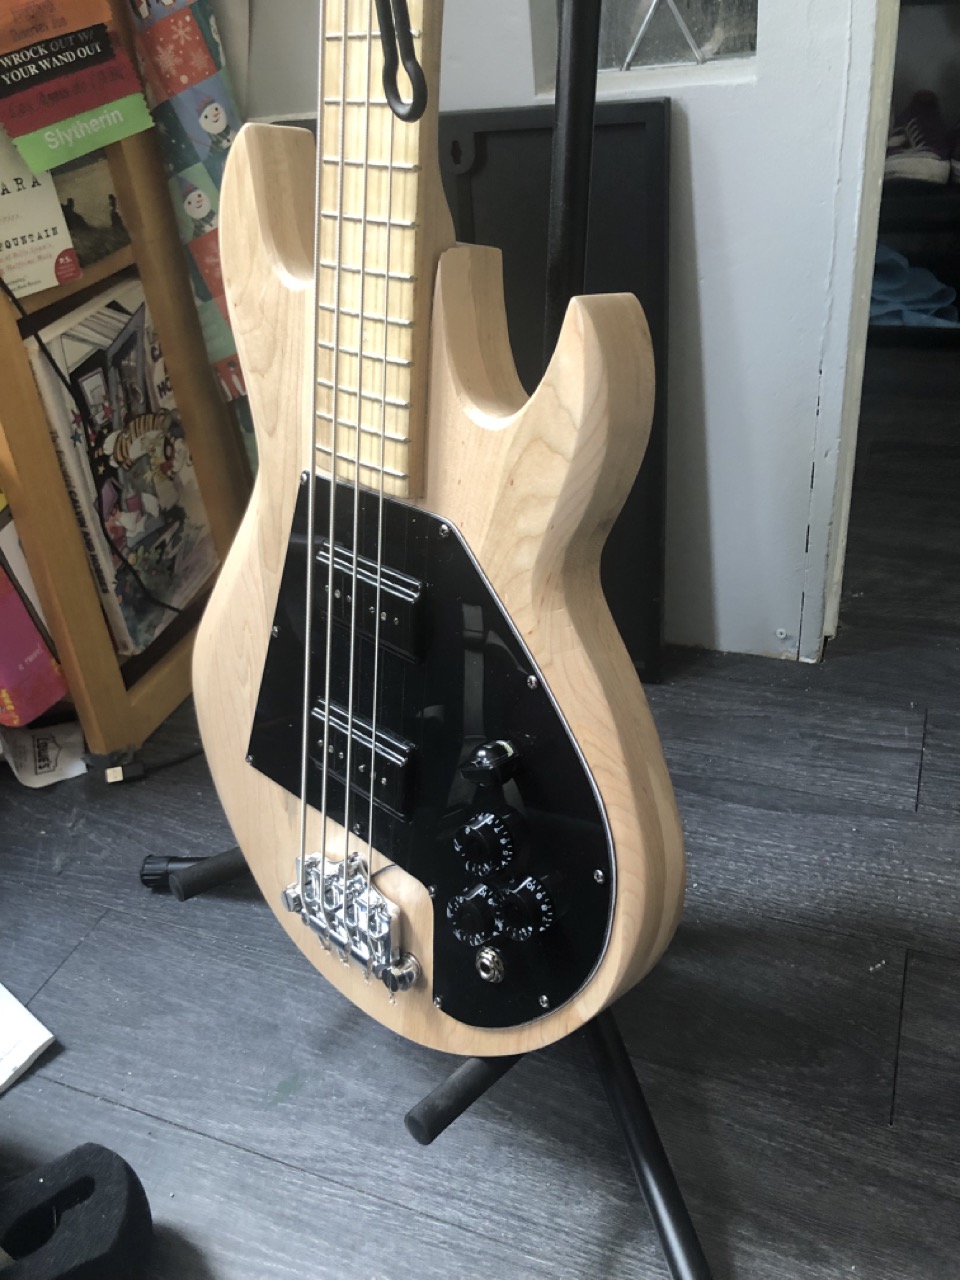
Short-scale Gibson Ripper Bass (aka the "Carroll Street", 2023)
This is the first one I can legitimately call "good." One of my favorite bands of all time is the excellent Chicago pop-punk band Pet Symmetry, and one thing I love about them is how loud and clean and gnarly their bass tone is. And from googling, that seems in significant part due to Evan Weiss' use of a Gibson Ripper, a weirdo bass from the 1970s and 80s with unique gnarly pickups. In the years since I started getting into Pet Sym, prices for used Rippers have gone from ~$900-$1200, to ~$2700-$3000, which !!!!!! Also, it turns out Seymour Duncan's custom shop makes reproductions of those original Ripper pickups. And also also Rippers, being giant and made of solid maple, are allegedly really heavy. So all of that, plus the fact I like playing short-scale basses more than full-scale anyway, I decided to try and make my own short-scale version of the Ripper!
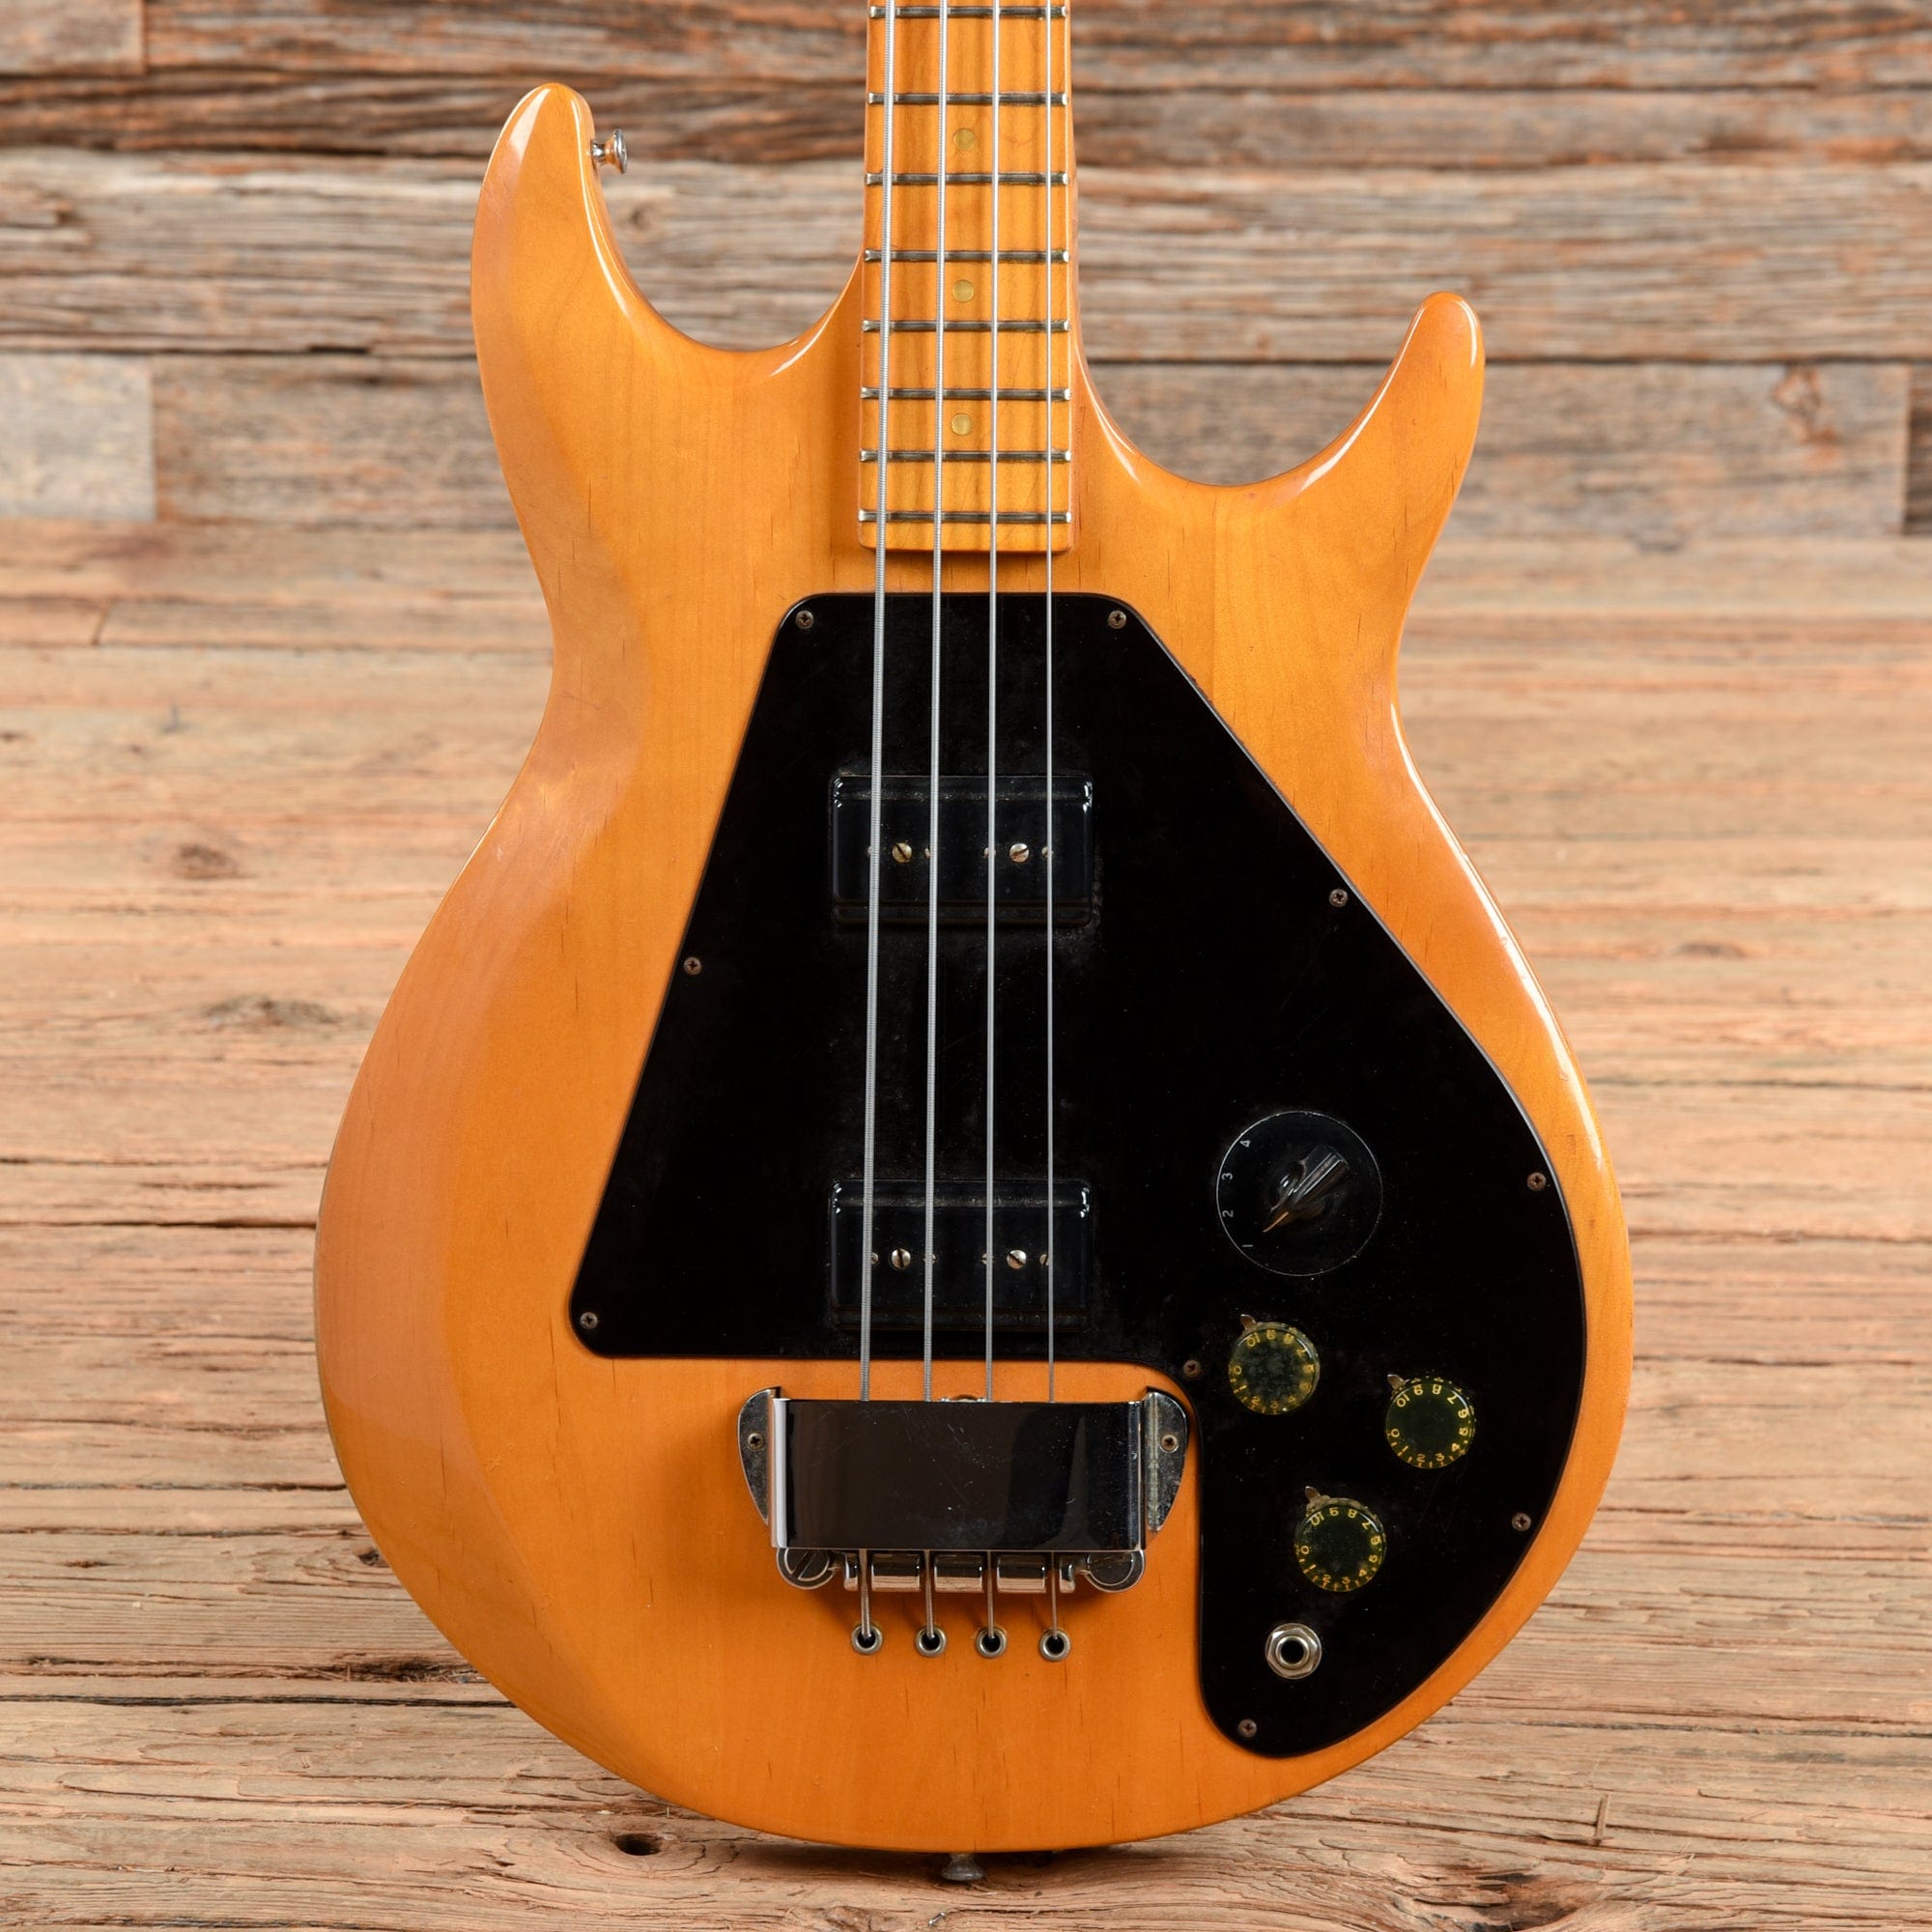 the original ripper
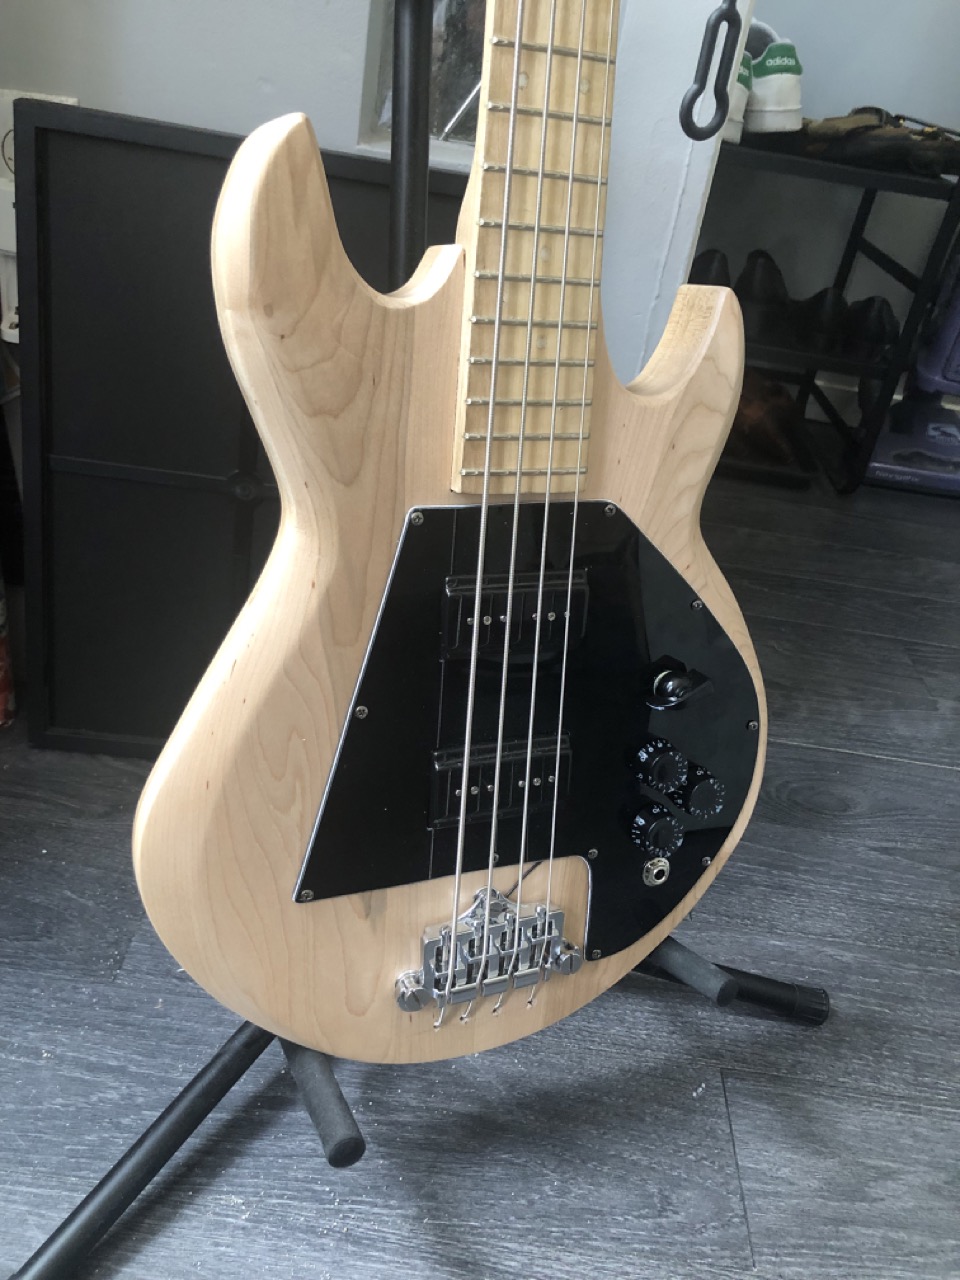
It's 30" scale length and all maple (maple body, maple neck, maple fretboard) finished with water-based polyurethane. Pickups are the aforementioned Seymour Duncan Custom Shop Ripper reproductions, wired with a modified 4-way switch: the original Ripper is wired with (not sure if this is the right order):
- Bridge only
- Bridge and neck in series
- Bridge and neck in parallel
- Bridge and neck out of phase
And this is wired with a relatively common mod that swaps the out of phase option for a Neck-only option.
The wiring isn't totally done, in that the third knob is supposed to be wired up to a mid-cut or "choke" filter, but I haven't done that yet, so it's just a vanity knob wired to nothing. But volume and tone are wired, and it plays!
Learnings!
- How to build a bass
- How to do a carve on a guitar/bass body
- How to wire a 4-way switch
- How to scale specs for a full-size bass down to short-scale
- How to do a scarf joint on a neck
- How to do a much much much better job at installing and dressing frets
- That I need a ground wire going from the bridge?? Somehow I missed that in the previous two builds?????
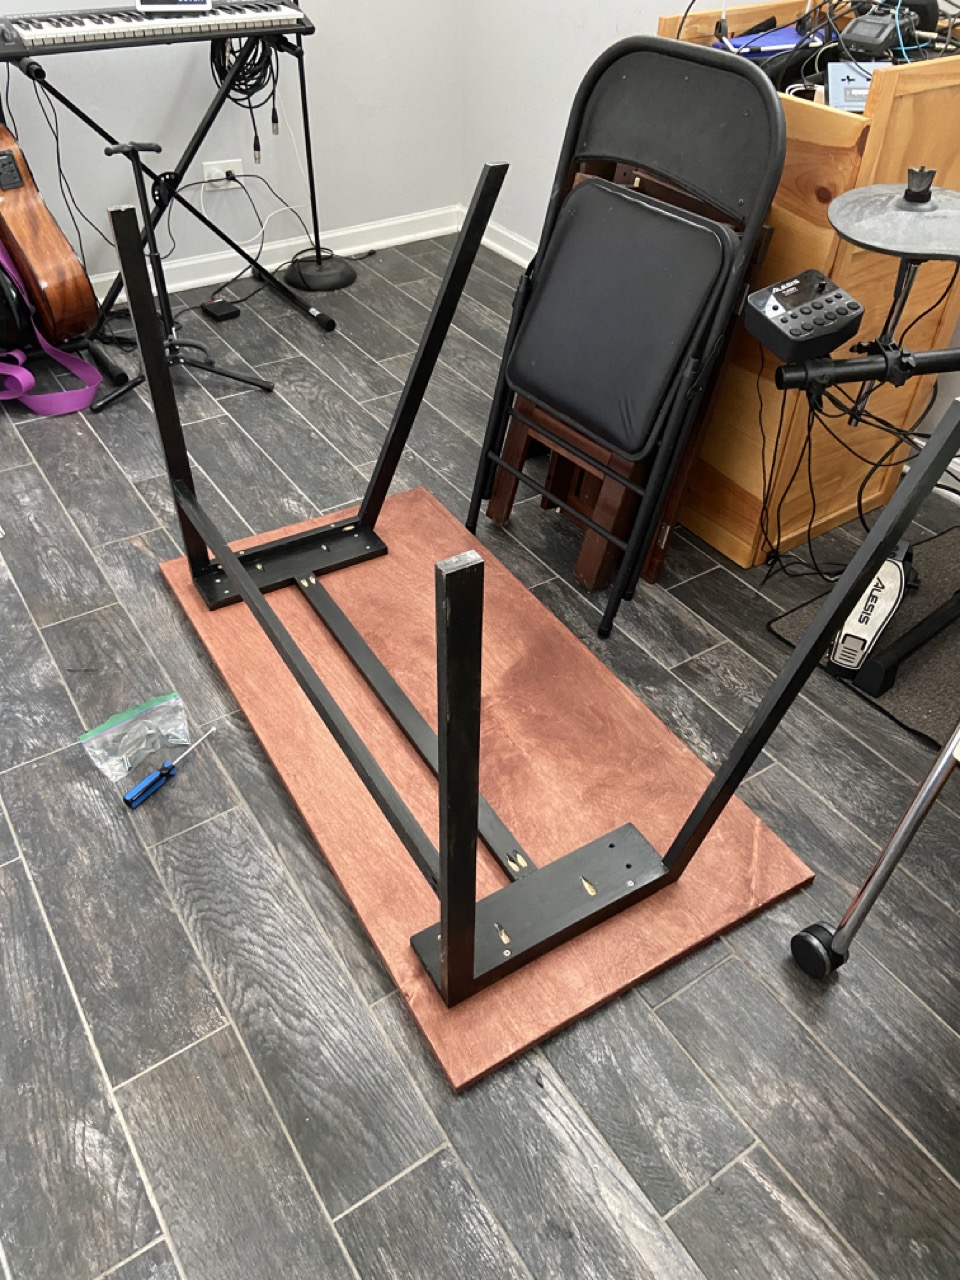
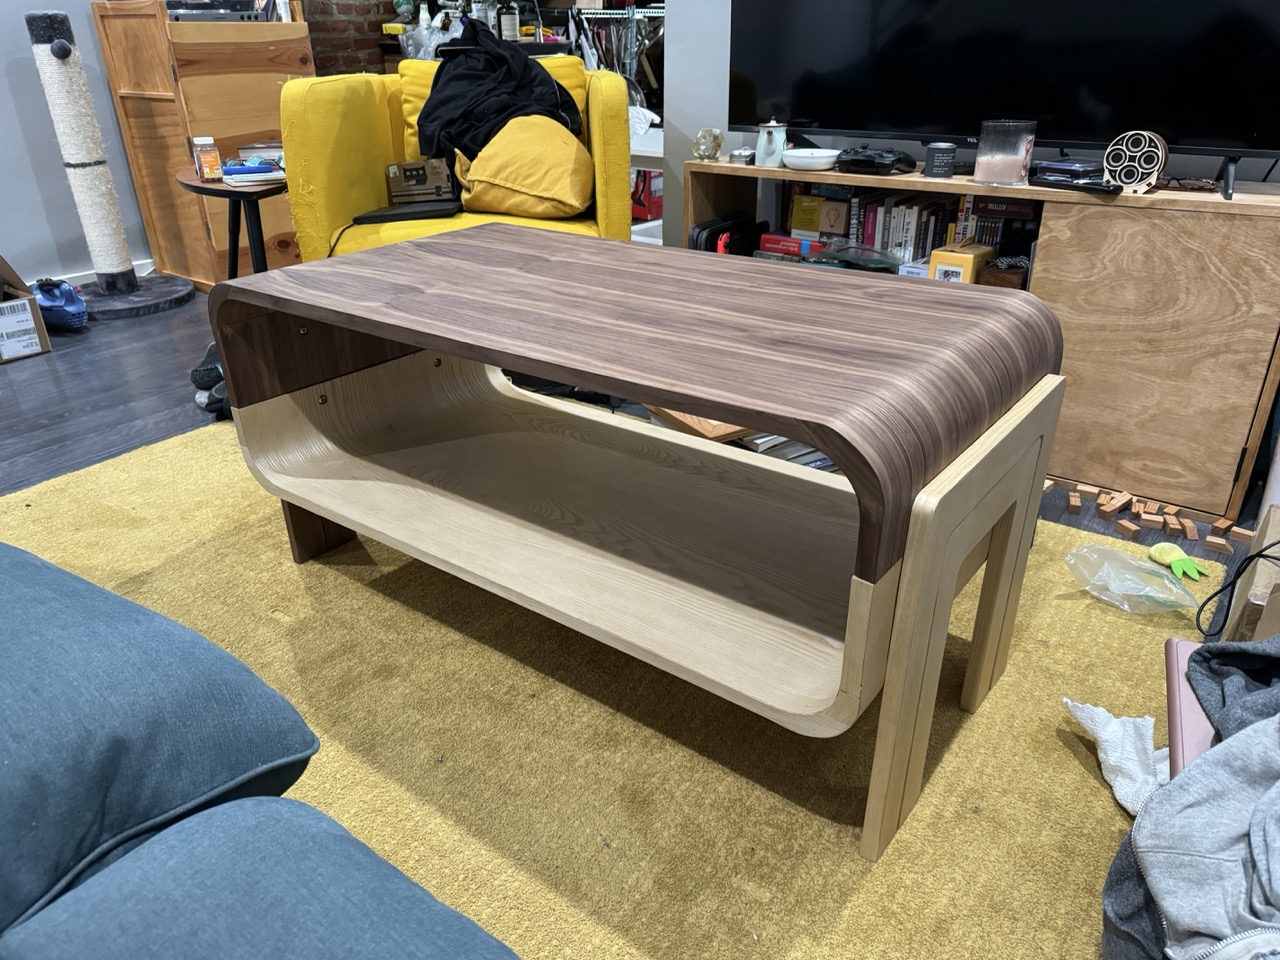
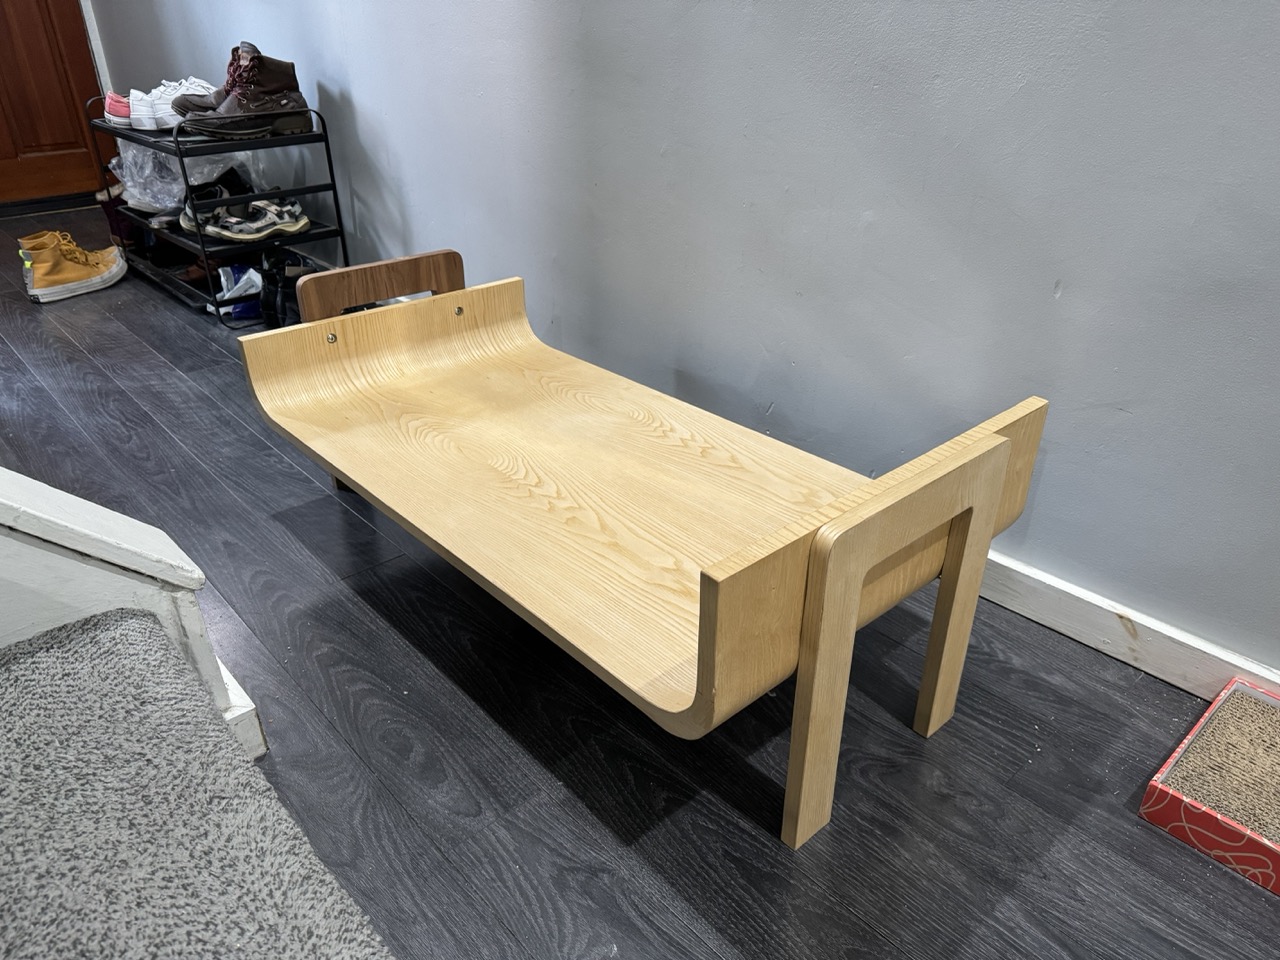
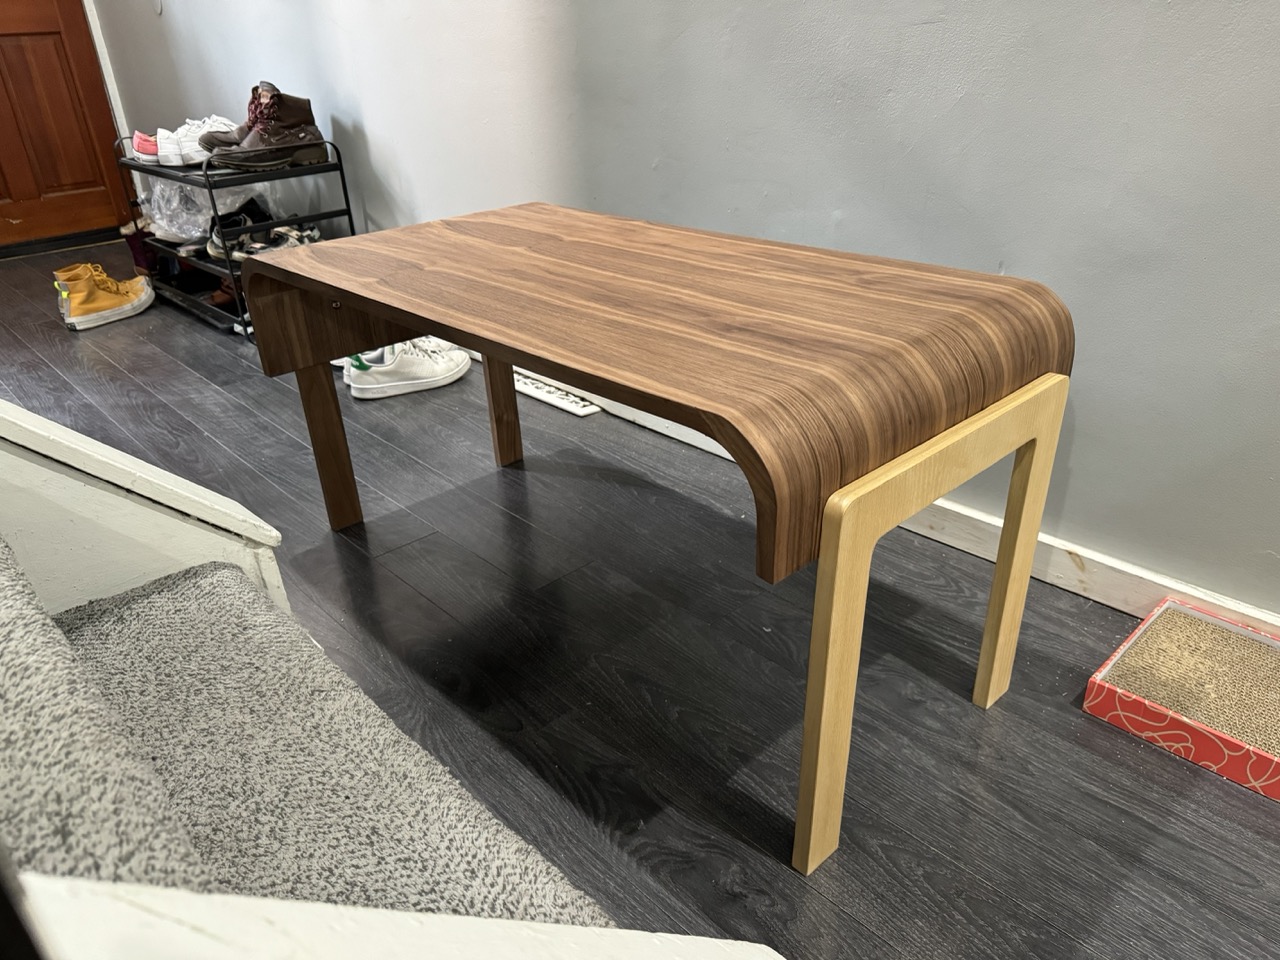
Coffee Table 2.0 (2024)
This project was nearly the (creative) death of me, taking about 6 months of stopping and starting. It's a coffee table that was originally designed to be modular and have enough of a lip that I could easily attach the racing wheel I use when playing F1 on my PS5, and while technically both are true, the actual design (and the fact that it's weighed down with coffee table books) makes hooking up the wheel exactly as much a pain as it ever was. Alas.
This is made of mostly plywood, and I tried about 5 different ways to do the corners, eventually settling on template cutting a bunch of 3/4" thick curved corner pieces of either pine or poplar (I forget which) and gluing them together to form the full corner piece, then pocket screwing them into the plywood panels for the top/bottom/sides. It's veneered in ash and walnut and finished with Osmo Oil.
It looks really great from one side, but the pieces don't exactly align on the other. Oh well, at least it's done!
Learnings!
- How to use pressure-sensitive adhesive veneer (aka PSA veneer), unfortunately via trial and error, as evidenced by some veneer bubbles in the final piece
- Trial and error into approaches for edge banding curves that look bad vs less-bad
- How to use hardwax oil finish
- An approach to large curves in wood (though maybe not the approach I'd use in the future)
- How to use threaded inserts
- How to use a bandsaw
- That done is better than perfect when a big project has been taking up basement space for 6 months
Bath caddy (2024)
Quick little one-weekend project; I like watching stuff on my iPad and having a drink while taking a bath, and this allows me to do that more easily! This is poplar finished with water-based polyurethane
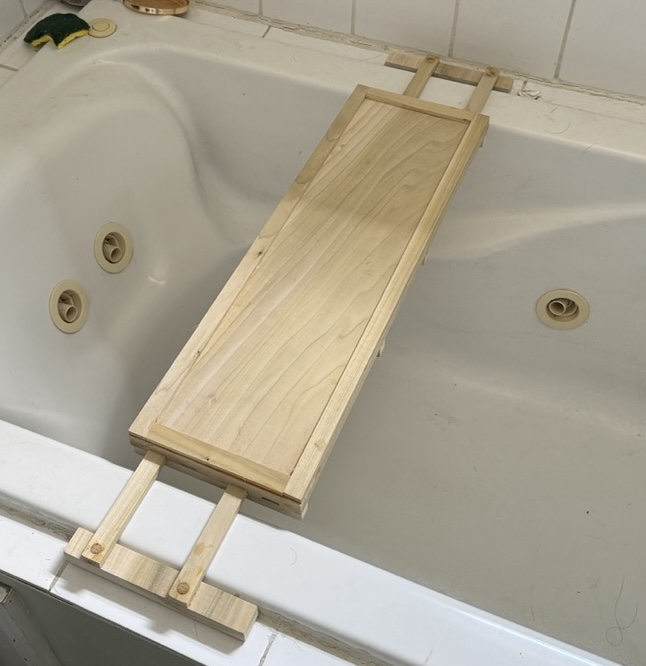
Learnings!
- When doing slides in grooves (like ones that are used for the side stretchers to extend) take into account the finish type when making the tolerances; specifically that water-based polyurethane will both swell the wood and act as a film on top of the wood (rather than penetrating into it) and so a tolerance that is easy to slide when the wood is unfinished can become way too tight once finished
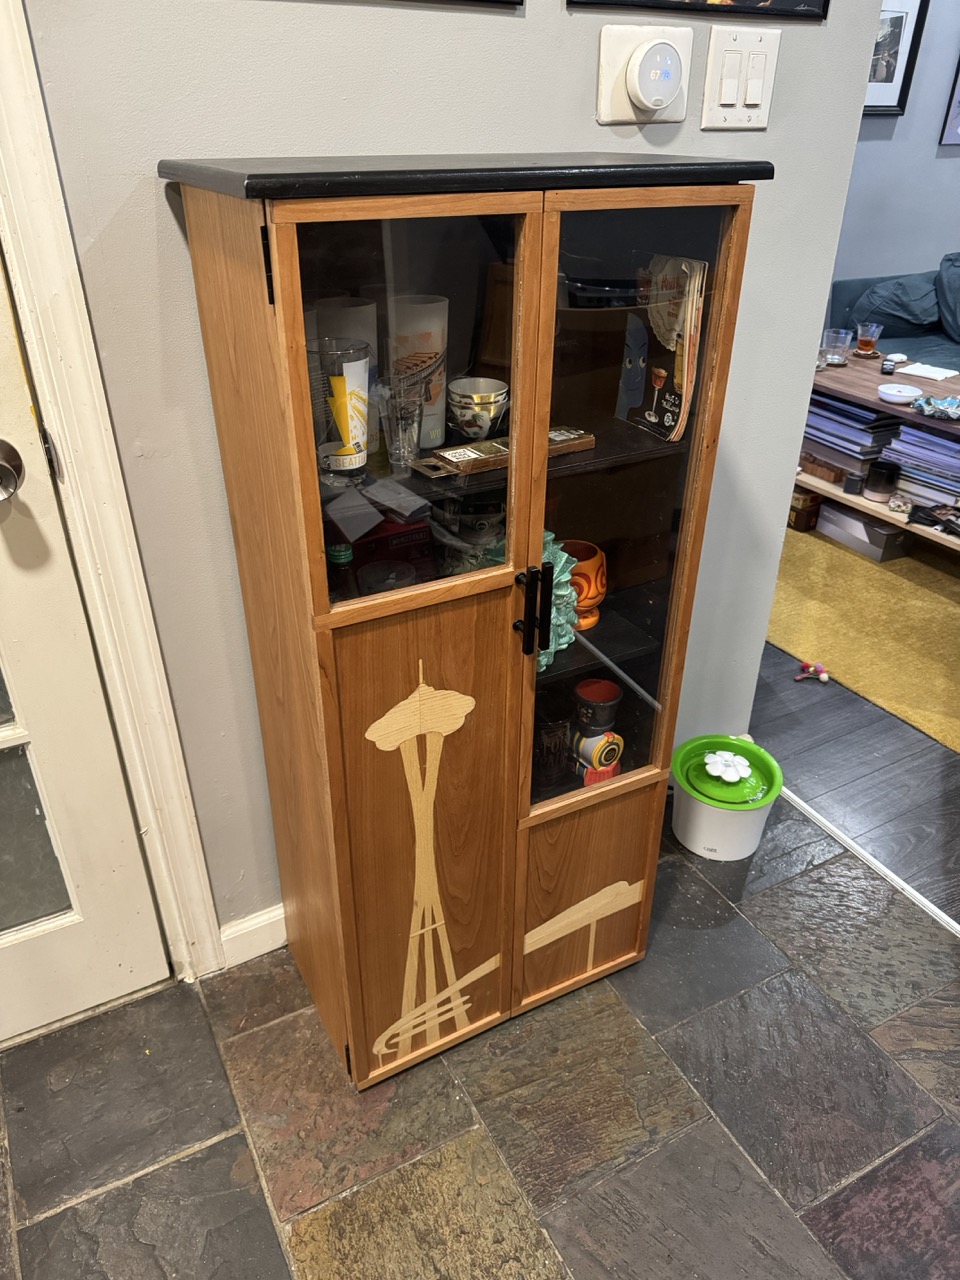
Display Cabinet (2024)
I've always been into collecting mugs and glassware, but recently started to get into collecting ephemera related to the 1962 Seattle World's Fair (and to a lesser extent the 1964 New York World's Fair), as well as the idea of having a bar area that's loosely mid-century inspired (see the refurbished liquor cabinet above.)
So, combining those together, we've got a Space Needle display cabinet!
The bulk of the cabinet is plywood with cherry veneer, with actual cherry as the door frames. The Space Needle pattern is marquety of the cherry veneer with leftover ash veneer from the coffee table above. The interior of the cabinet and the top is painted black, with Osmo Oil as the finish on the rest. And the "glass" is actually acrylic, because I'm too scared to work with glass currently (and know I'll have to move this cabinet next time we move apartments.)
Learnings!
- How to do a better job of using PSA veneer (no bubbles this time!)
- Incremental progress in making a cabinet (this is the best and most square so far)
- Remember to take into account door dimensions when designing the cabinet (in this case I intended for the top to extend ~1/2" out over the front of the cabinet, but didn't take into account the fact that that doors are 1/2 frames..... so it doesn't extend at all)
- How to do marquetry via (what I believe is called) countour cutting
- That I really like the look of painting the inside of a cabinet black
- That I love the color of cherry
- How to work with acrylic (including various things not to do that resulted in some ugly scratches and gaps)
Bass Ukulele (2024)
I've wanted to buy a bass ukulele for about a decade, and realized I could try and make one! This is a one-piece construction out of I believe mahogany, but I actually don't remember 🥲 The bass is fretless with black epoxy for the fret markers, and is supposed to have an under-saddle piezo pickup..... but it doesn't work. I don't know whether it's an issue with the pickup, the pre-amp, the way I constructed my bridge, or whether I broke something in installing, and I'm so frustrated by that failure that I haven't even considered trying to fix it in over six months. Like a lot of recent things, it's finished with Osmo Oil.
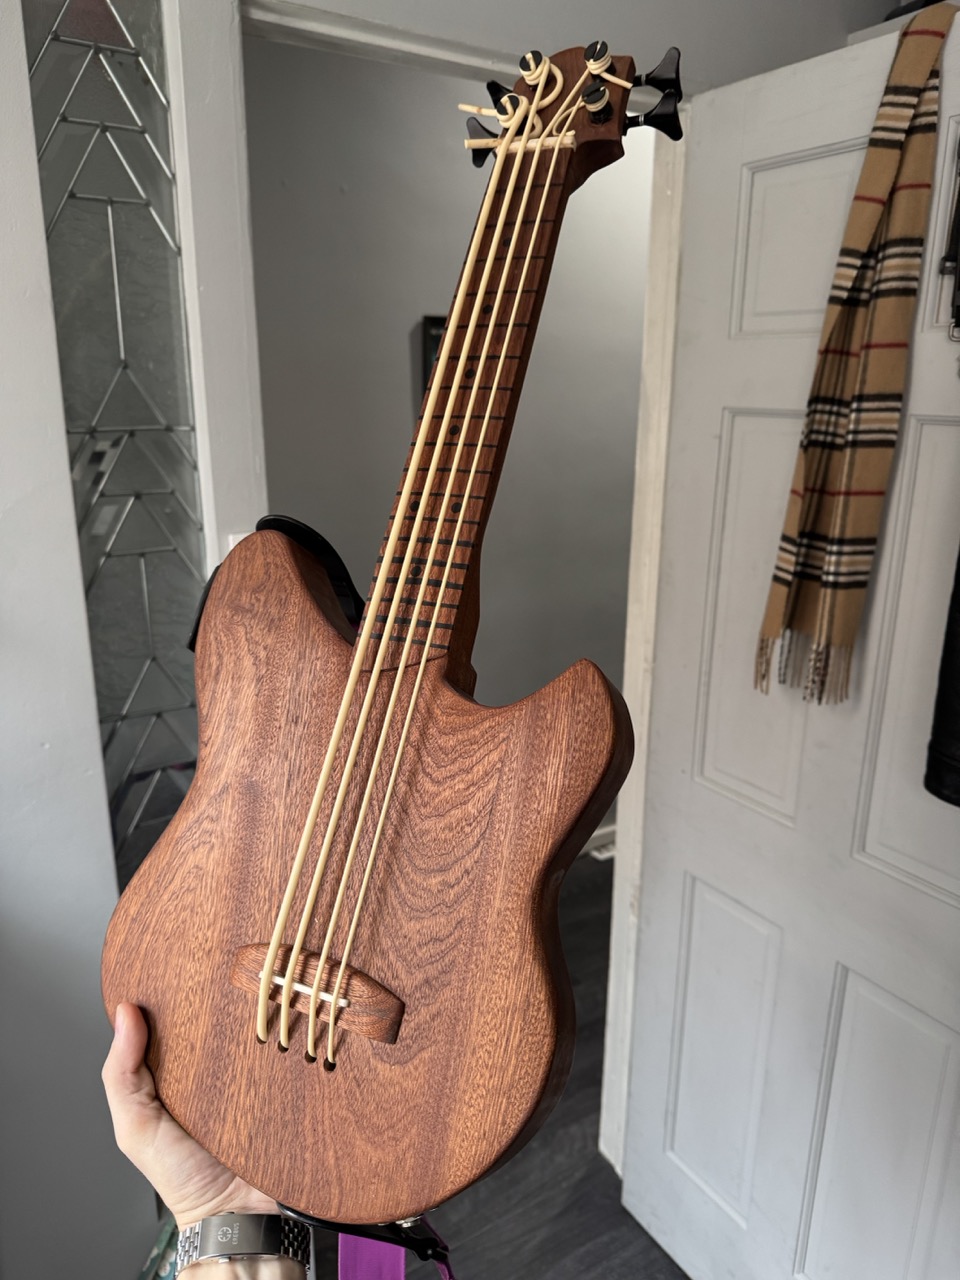
Learnings!
- How to make a one-piece guitar-type thing
- How to build a bridge and make a nut out of blanks
- How not install an under-saddle piezo
- How to use colored epoxy for guitar neck markers
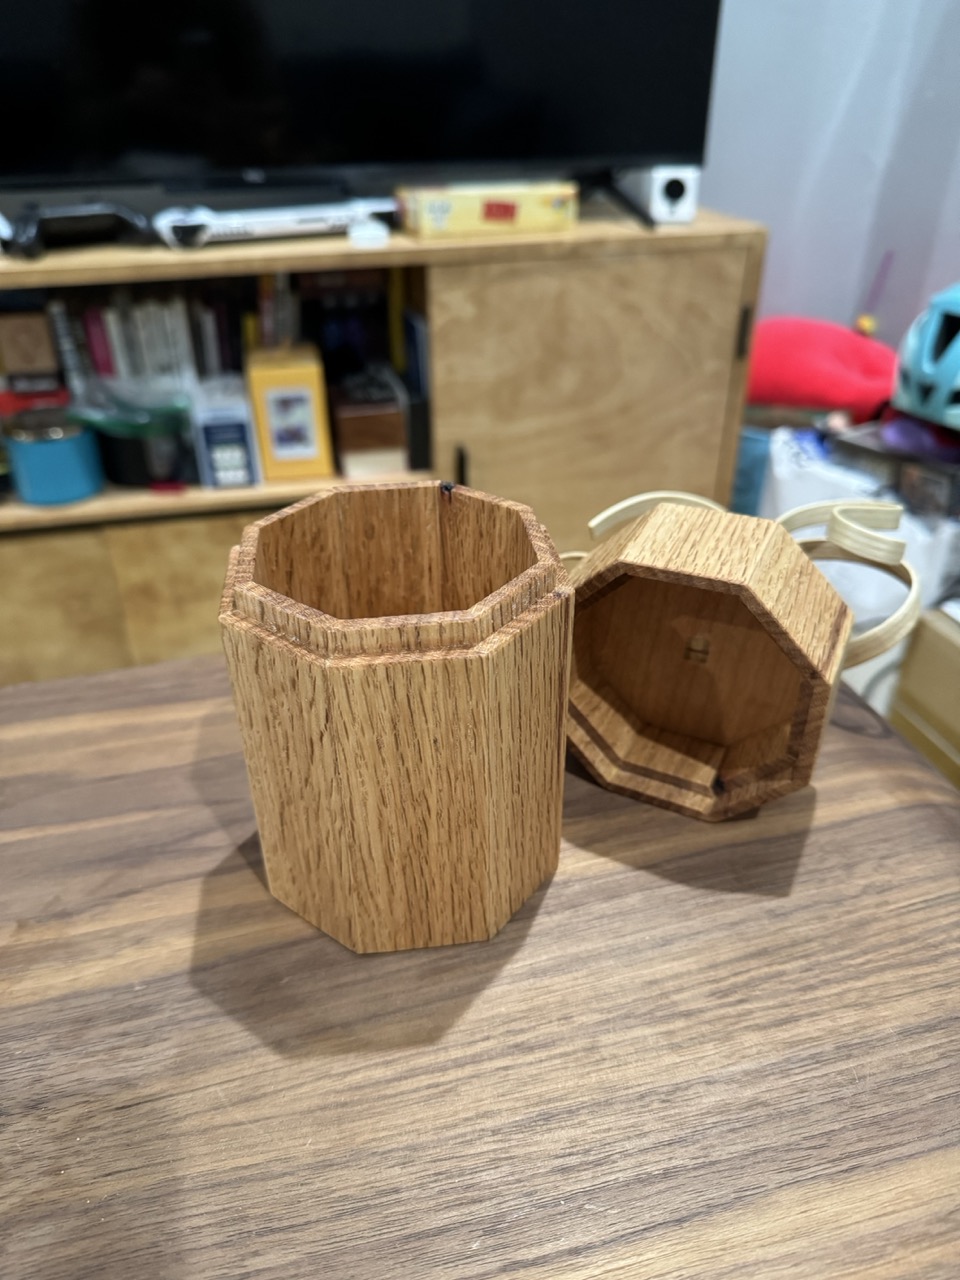
Spiral Sprout Box (2024)
This is the result of a great class I took at the Philadelphia Furniture Workshop, taught by the excellent Larissa Huff! I wanted to take this class specifically because 1) I'd already enjoyed a previous class I took, 2) I knew of Larissa's work and wanted to take a class from her, and 3) this seemed pretty different from anything else I'd made, so I figured this was a good opportunity to learn things I wouldn't come across naturally.
The box is octagonal and made out of red oak for the sides and cherry for the top and bottom, with the "spiral sprouts" made out of steam-bent pieces of ash. The lid attaches to the box with opposing rabbets, and the sprouts are locked into the lid via a mortise and tenon. And again, finished in Osmo Oil!

Learnings!
- How to make a captured lid top (and bottom) with a rabbet and dado
- How to do the type of lid where you make two opposing dados and then cut the lid on a table saw to have the lid fall right onto the box
- How to do hot-pipe bending
- How to hand cut a mortise and tenon
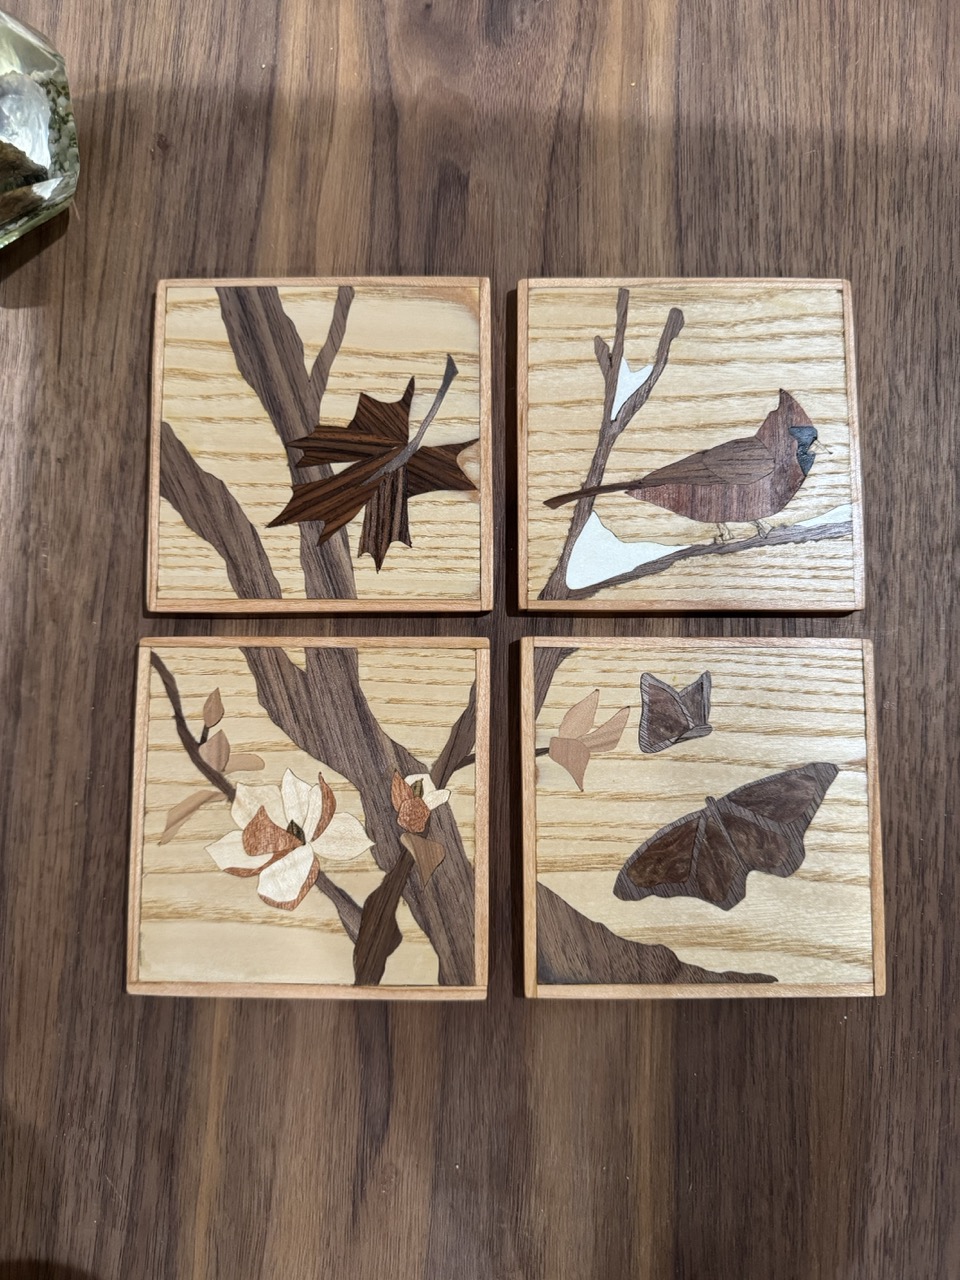
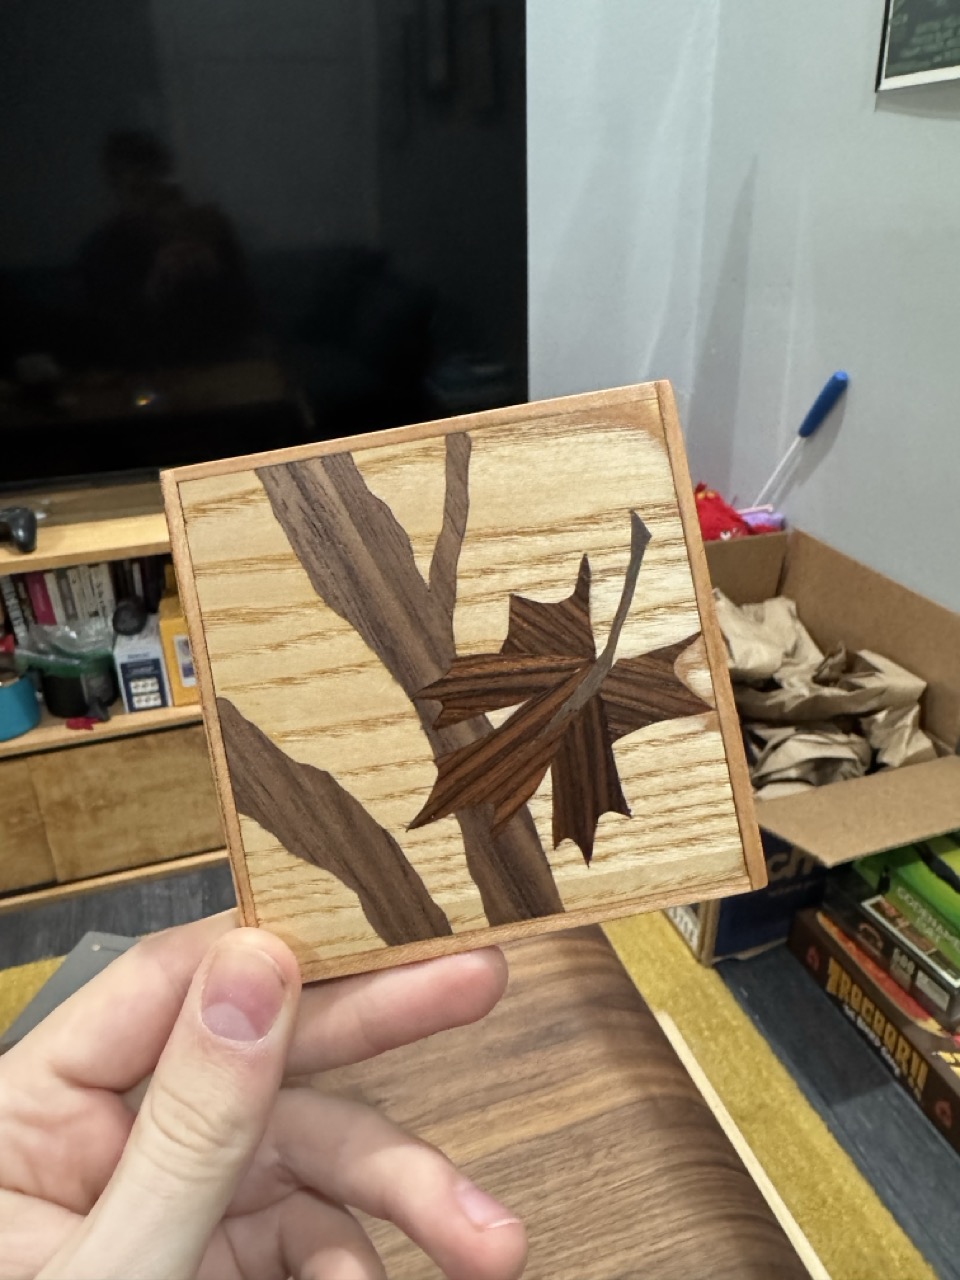
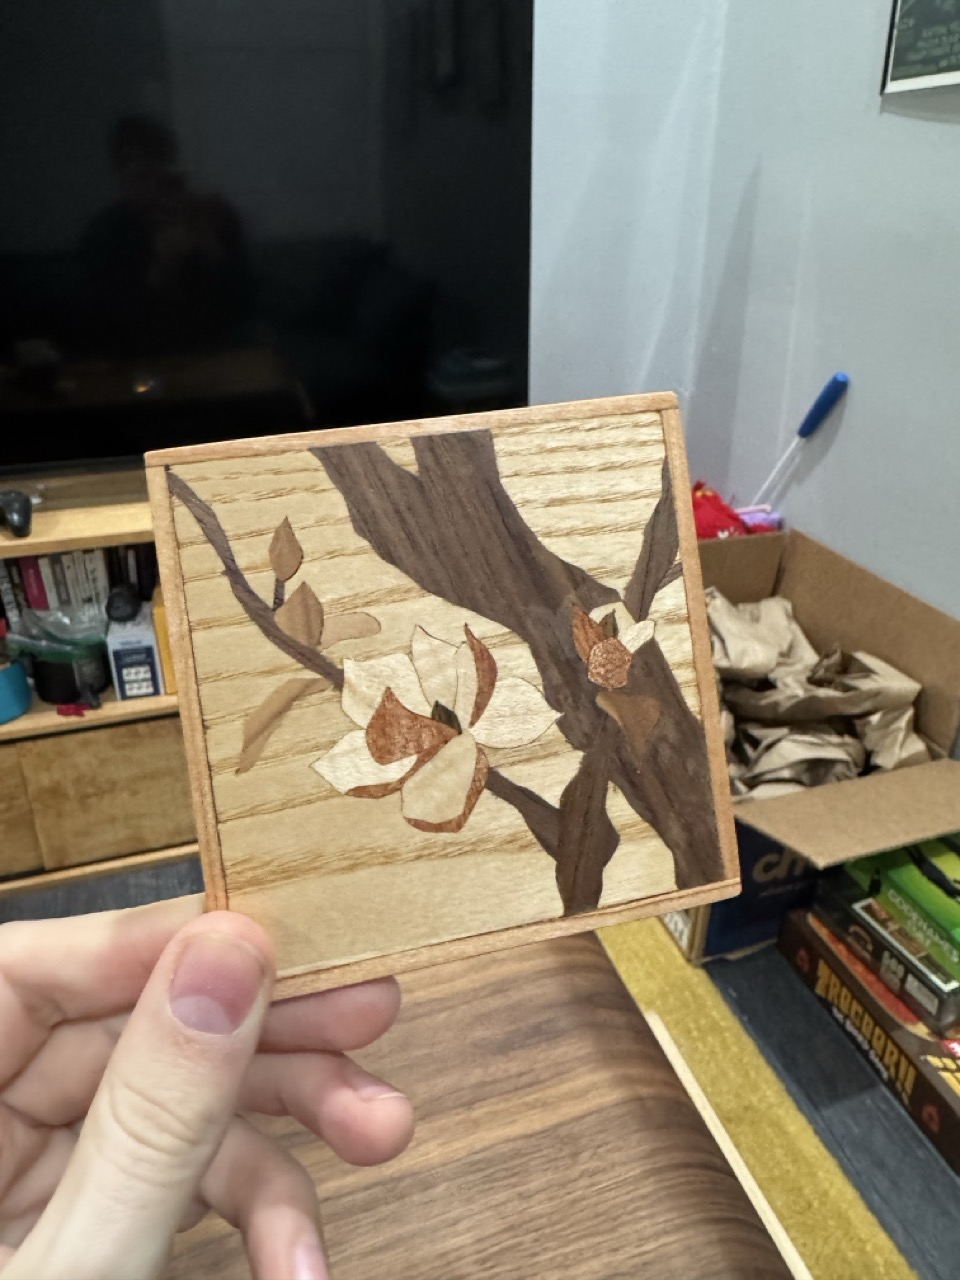
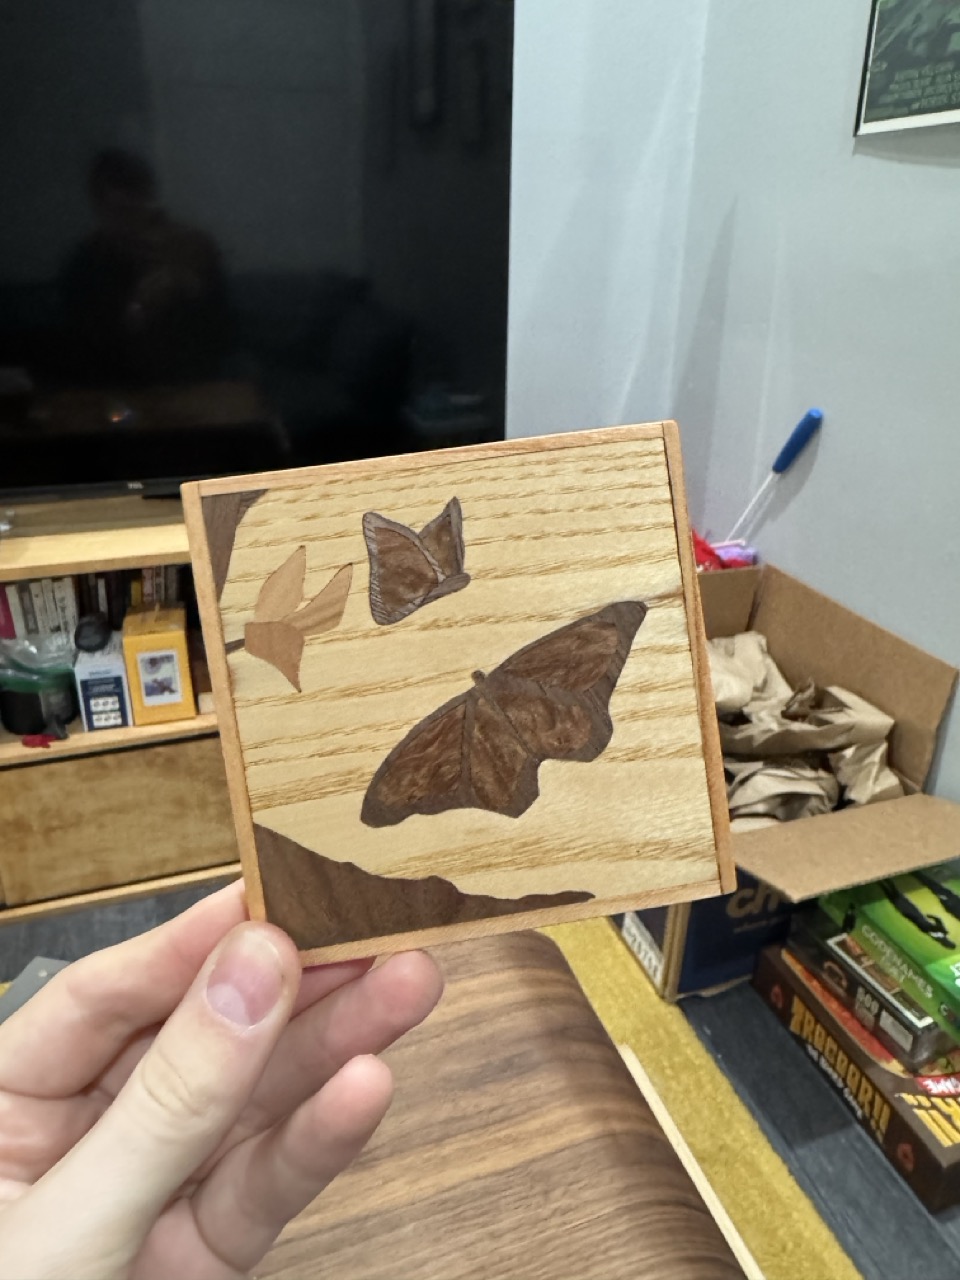
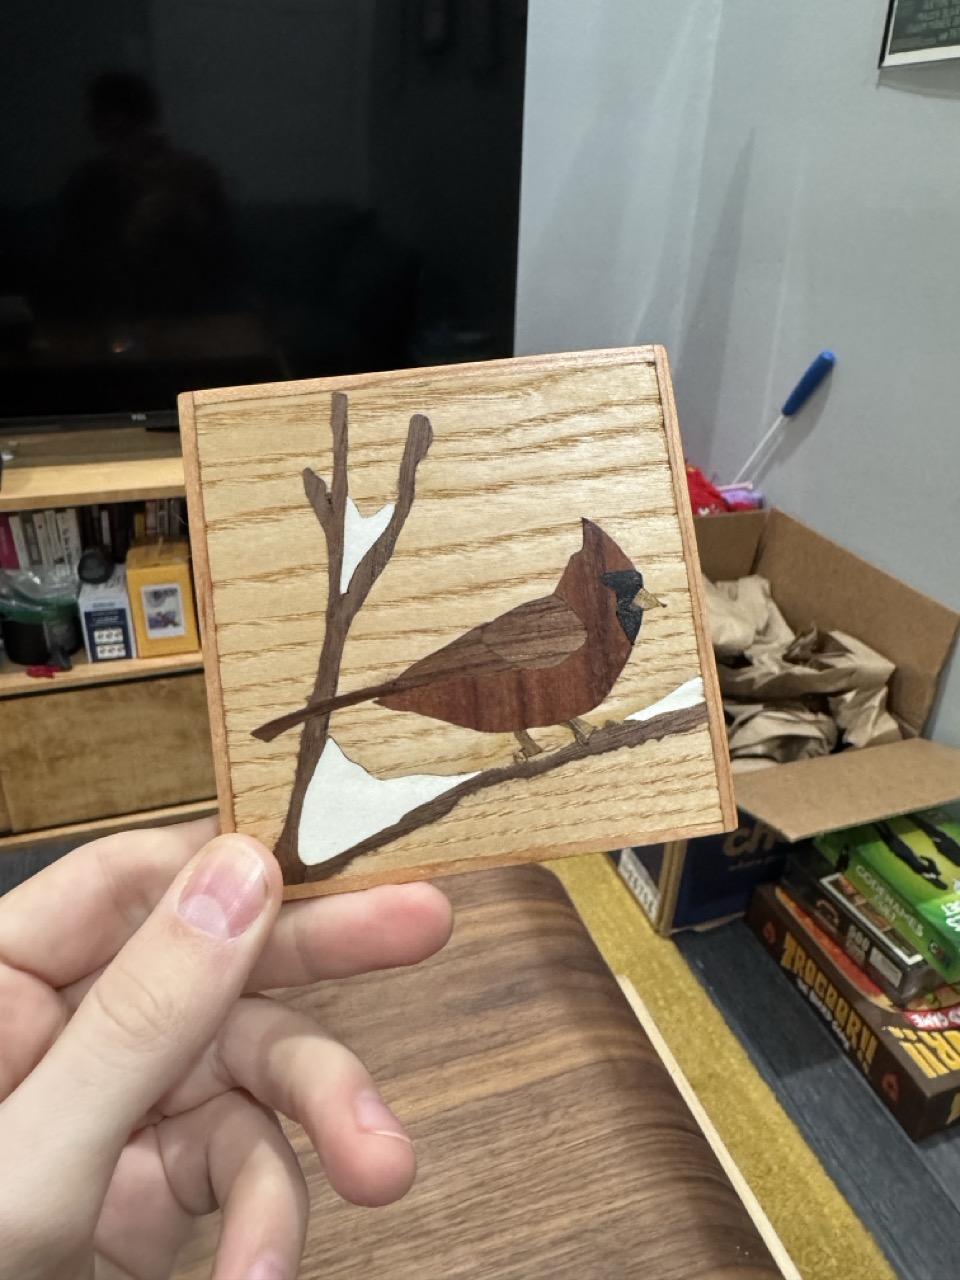
Marquetry Coasters (2024)
I mentioned I had previously taken a Philadelphia Furniture Workshop class, and it was back in 2023 where I learned how to do double-bevel marquetry from Craig Vandall Stevens. In 2024 I decided (foolishly!) to take that and use it to make a set of coasters with a marquetry pattern (designed by my wonderful partner) And so here they are! I made four sets for mine and my partner's family, each a set of four with this sort of four-seasons pattern. They're double-bevel marquetry of a whole variety of veneers (including leftover walnut and ash from, you guessed it, the coffee table!) veneered onto a 1/4" plywood core, edge banded with solid cherry. And again, finished in Osmo Oil. I'm committing to using up my can of it before the end of summer 2025.
This made me go insane for the month of december, it was so much work lol!!!
Learnings!
- Re-learning how to do double-bevel marquetry, including:
- 1) if you are cutting with the insert piece on top, you need to cut counter clockwise (otherwise the gap in the background piece will be too large for the insert, which I messed up the first several tests! (if you have the background on top, then you cut clockwise))
- 2) how thick the veneer needs to be for the particular angle of my marquetry pony and size of my saw blade
- 3) you should generally work back-to-front in terms of the "z-axis" of your design when cutting and gluing particular pieces, as it'll better help sell the illusion of depth
- PSA veneer works for double-bevel marquetry, but it's more annoying to glue than just using regular veneer
- I actually really like the look of dyed veneers, surprisingly so!
Guitar 3 - Les Paul style #1 (2025)
Pictures tk!
Chopsticks (2025)
Pictures tk!
Recommendations
I've had a few people ask, whether out of curiosity, politeness, or a desire to learn themselves, how I got into woodworking and if I have any recommendations for learning. And like basically 100% of hobbies I have in adulthood, it primarily spiraled out of Youtube, with a year or two of watching videos from DIY and woodworking creators sparking a desire to try myself, and then further watching helping me learn skills, get inspiration for projects, and keep the desire to make stuff alive.
For me, these channels serve basically three purposes:
- Entertainment (after all, I liked watching woodworking youtube for a long time before starting woodworking)
- Inspiration (one channel in particular is pretty clearly my biggest design inspiration lol, you'll see when I get to it)
- Education (learning specific skills! Tips! Tricks!)
All three of these will definitely vary depending on your own styles, preferences, and experience with woodworking. For me a channel might be fun, full of gorgeous designs I want to try, and teach me tons of valuable basics while you may find it grating, full of ugly designs you'd never be caught dead with, and not teaching you anything you didn't learn years ago.
With that, these are my personal favs, with the first two as my big "recommendations":
- Foureyes Furniture/Shaun Boyd Made This (my favorite duo-turned-pair-of-solo woodworking Youtubers, and blends all three purposes. But they're professionals so it's my biggest inspiration and entertainment channel, but maybe less immediately relevant as education for a beginner. They primarily make high-end wooden furniture in a mid-century-modern inspired style.)
- Steve Ramsey (hands down the best beginner "How to learn woodworking" channel. Entertaining for sure, but an invaluable resource for basic skills. He mostly makes household projects, ranigng from furniture, built-ins, and small projects like mirrors, picture frames, and boxes.)
- The Sorry Girls (a DIY channel that features some woodworking. More entertainment and inspiration, though some specific skill learning, particularly for DIY stuff outside of woodworking.)
- Evan and Katelyn (a general maker channel that started doing more woodworking and now primarily do other stuff like stunt DIYs and resin crafts. Entertainment mostly!)
- Xyla Foxlin (also general maker, but with a lot more woodworking. Tends to be high-concept projects, like building canoos, bass guitars, teardrop trailers, rockets, etc. Entertainment > Inspiration > Education, though she does a good job of explaining every step she takes even in big and complicated projects!)
- Crafted Workshop (woodworking and renovation, so an invaluable education tool for construction and renovation stuff, and pretty solid on the woodworking side. Probably education > inspiration > entertainment)
- Modern Builds (very hit or miss for me, but woodworking/DIY/renovation that aims for "modern" design on limited tools and limited materials. When it hits, inspiration > education > entertainment; when the designs look bad (per my tastes and aesthetics, to each their own) then the order flips.)
Since then it's been Youtube, trial and error, and a couple of woodworking classes (and very recently reading some woodworking books and magazines) but Youtube is still, hilariously, the 90% source for learning.